Create a User
User profiles provide Access to Webolytics Portal and are unique to any individual. User Profiles need to have a unique email address and password in order to be accessible.
Create a User
To add a user to Webolytics, select the spanner in the top right corner to access the admin console.
Go to Users from the dashboard

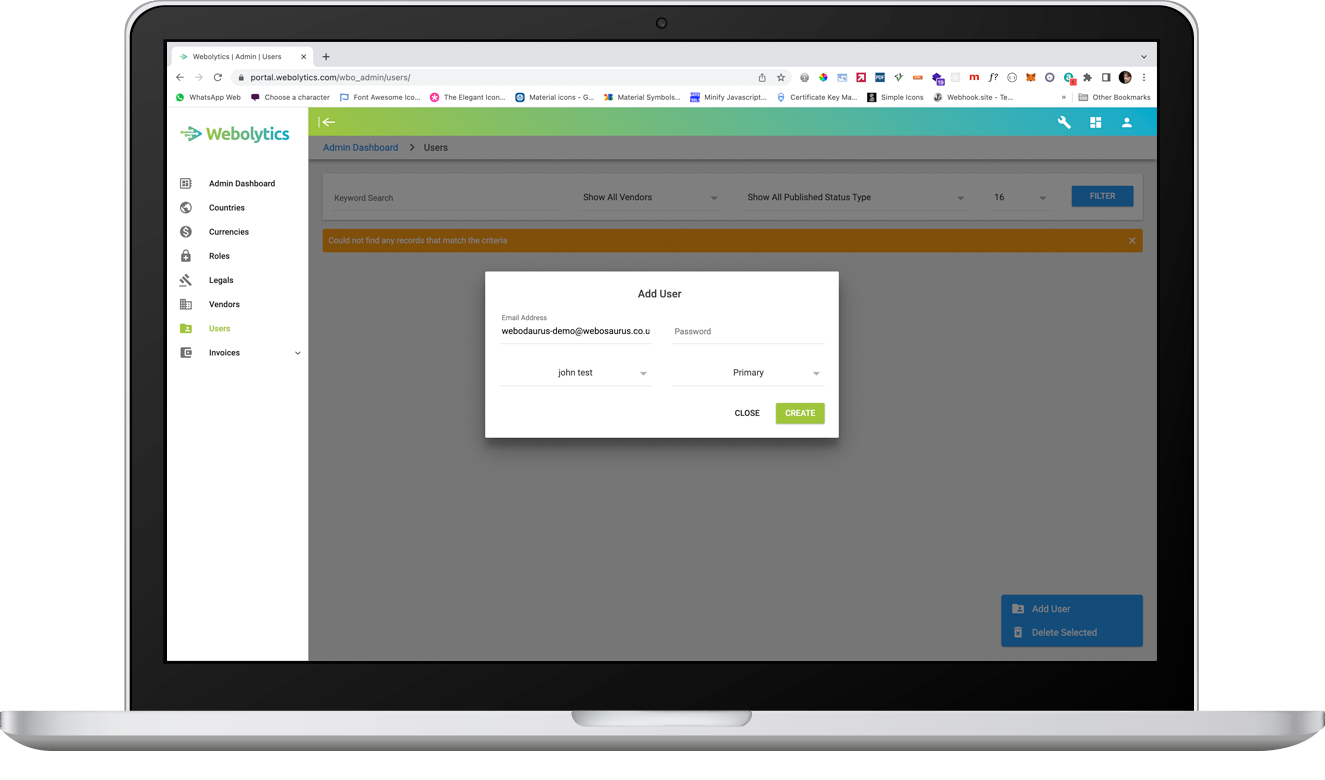
To create a new user, click the blue control button to the bottom-right of the screen and click “Add User”
Fill in the form and click ‘Create”
Important: Email addresses must be unique. Additionally if you make the user that is being created a Primary User of the selected Vendor, then the previous Primary User will become a normal user.
Your new user will now be present in the Users List.

Granting User-Access
In order for a user to gain access to Webolytics, they will need to have their set-up completed.
To do this, click on the edit icon to the right of the new user that has been created

The first thing to do when on this page, is to select a user Role.
Roles govern what a user can do, and see. If a user has no role assigned, then they will not be able to see or do anything in webolytics.
To select a role, click the green ‘+’ button on the top-right of the Roles Block.
Select your desired role for the user, and click the green tick.
Please click here for more information about webolytics roles
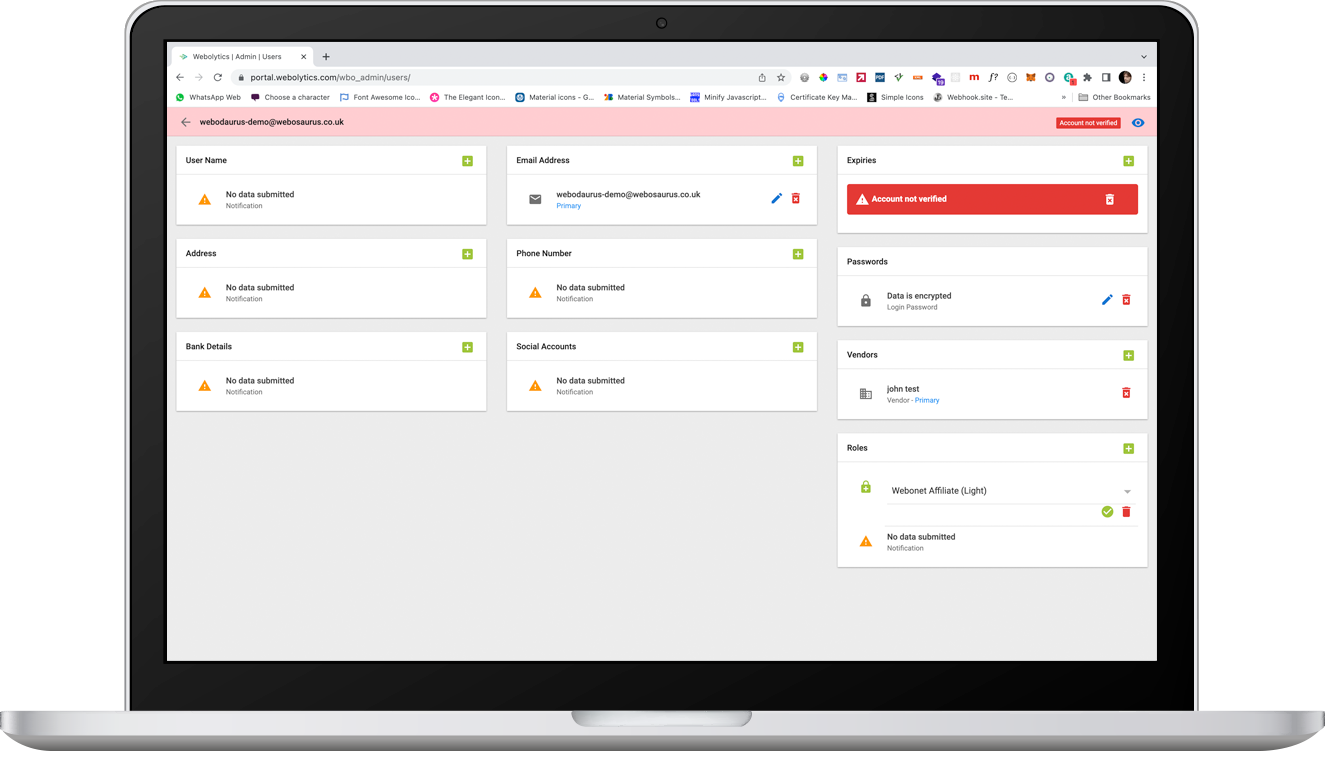
The next thing we need to do is to remove the Expiry on the user.
To remove the expiry, click the trash can inside the red expiry notification stamp.
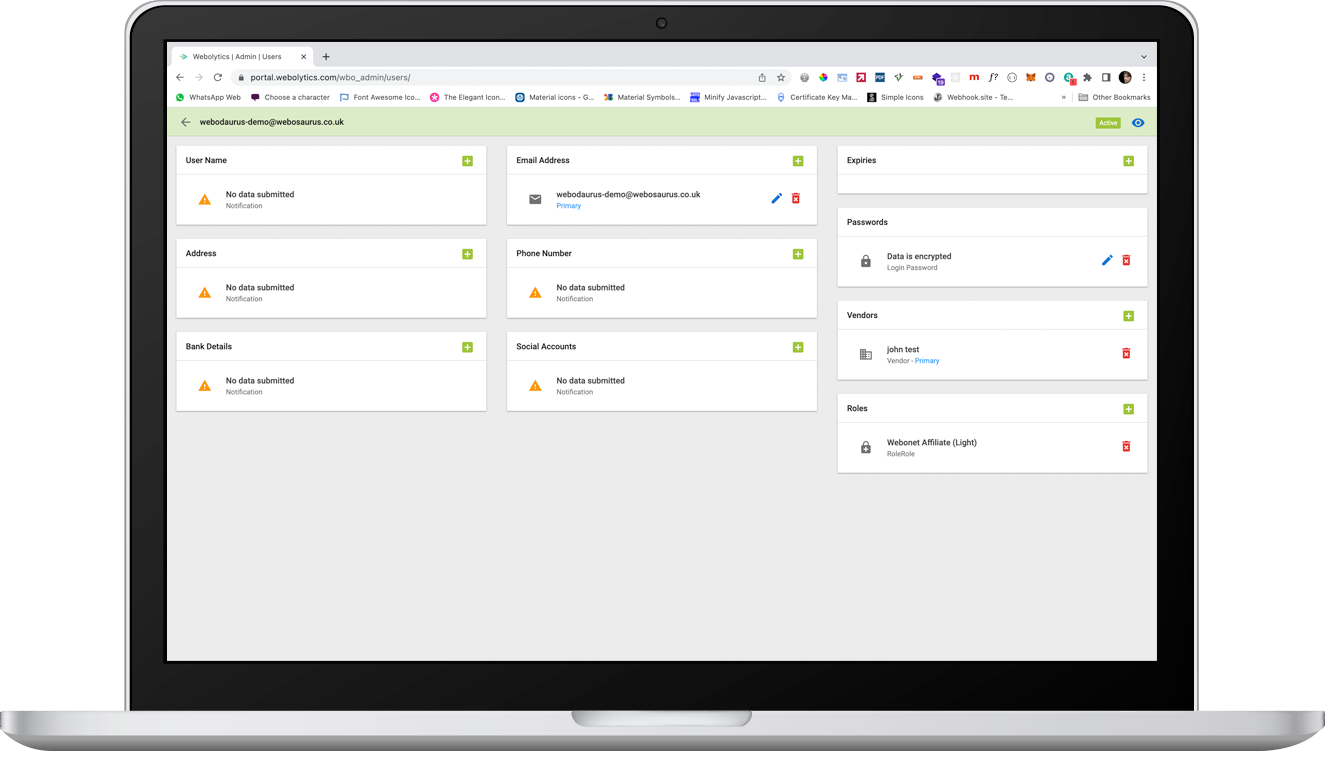
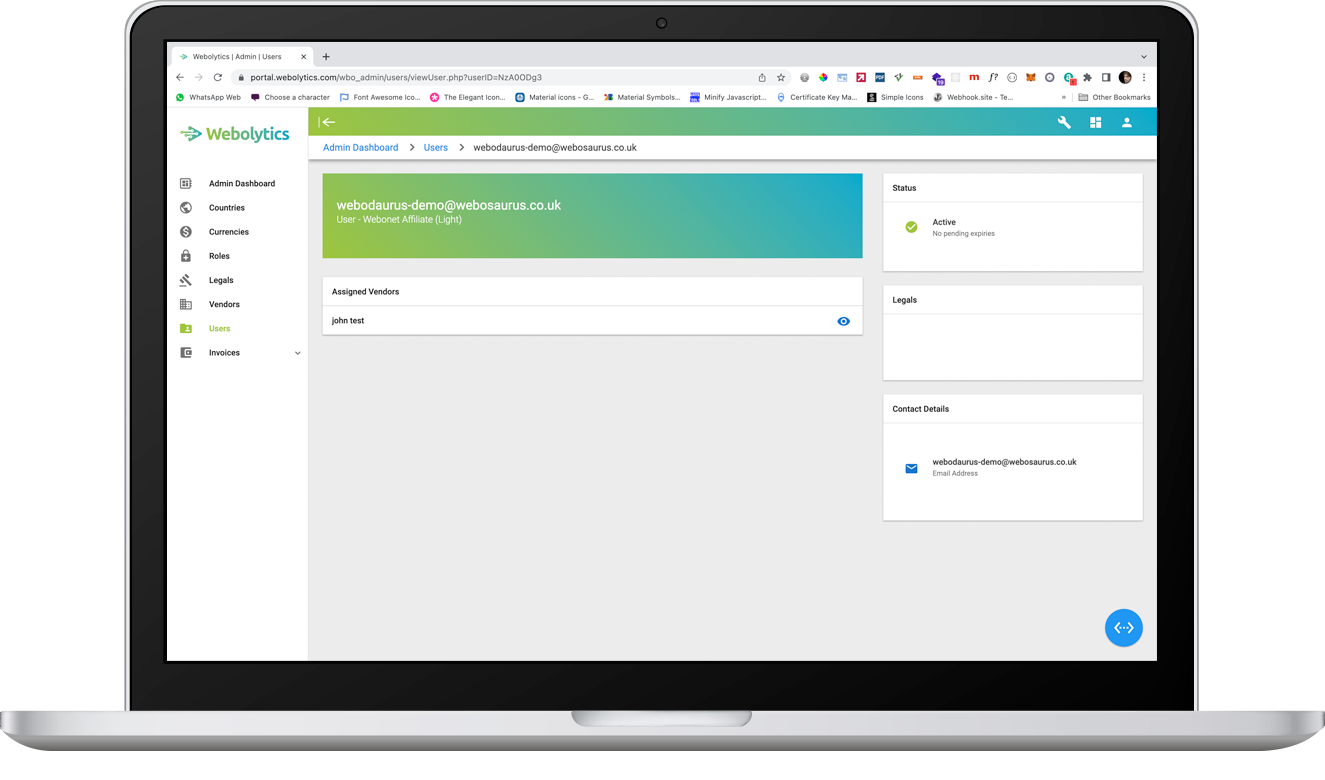
Your user will now have access to their portal. To view the user, click the view icon to the right of their name in the user’s list.
This will show their profile page.