Zoho Form Module
The Webolytics Zoho Lead Capture module is a Form Module that’s allows for posting a lead directly into Zoho.
Before creating a Zoho Form Module, a new Zoho Connection will need to be set up against a vendor.
Creating a Zoho module
Log into webolytics, and go to the Form Builder > Forms and select the desired form > Edit. On the form that appears, scroll to the bottom-left form modules block. Click the Green ‘+’ button in the Form Conversion Modules Block, and select ‘Zoho Lead Capture’.
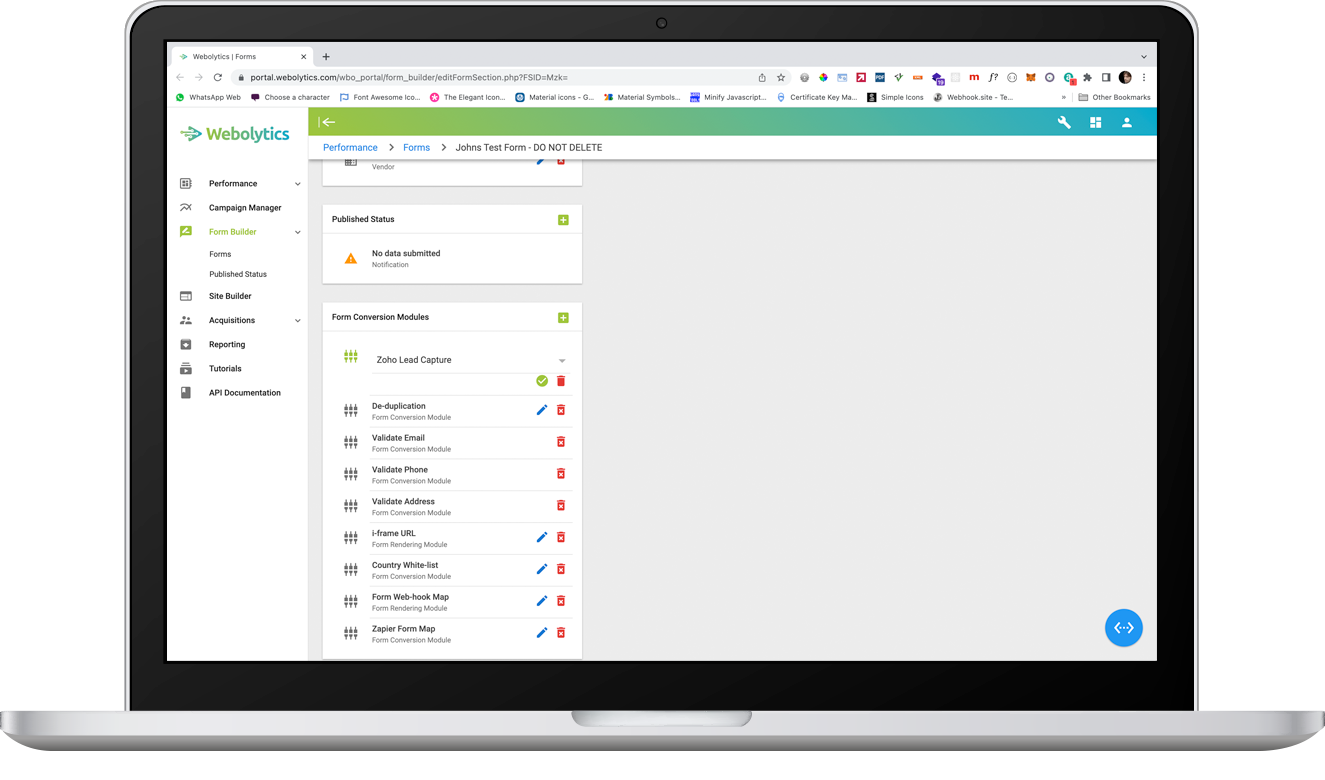
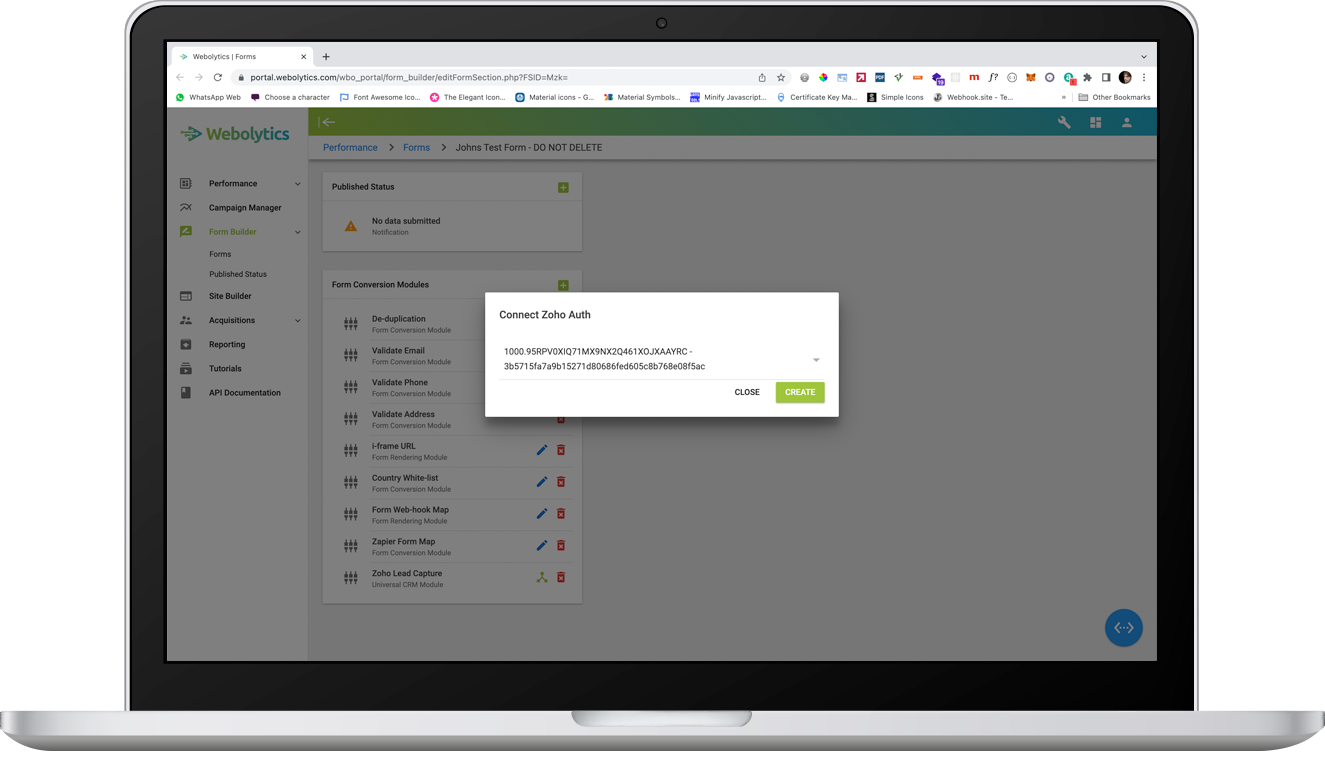
Once created, you will see you new Module in the list on the block. Click the green API icon next to the module to connect the form to zoho. On the modal window, select the Zoho Connection and click ‘Create’.
Once a Zoho Module has been created and connected, it will be ready to have the form values in webolytics mapped to it.
In order for the form to push to Zoho, the module will need to have relevant fields mapped to it.
Setting up the Zoho Module
Click the edit icon next to the Zoho module. This will launch a modal window which allows for control of the module.
By default, the module does not push to Zoho. To change this, turn on the Push to API switch in the top right of the modal and click ‘Update’.
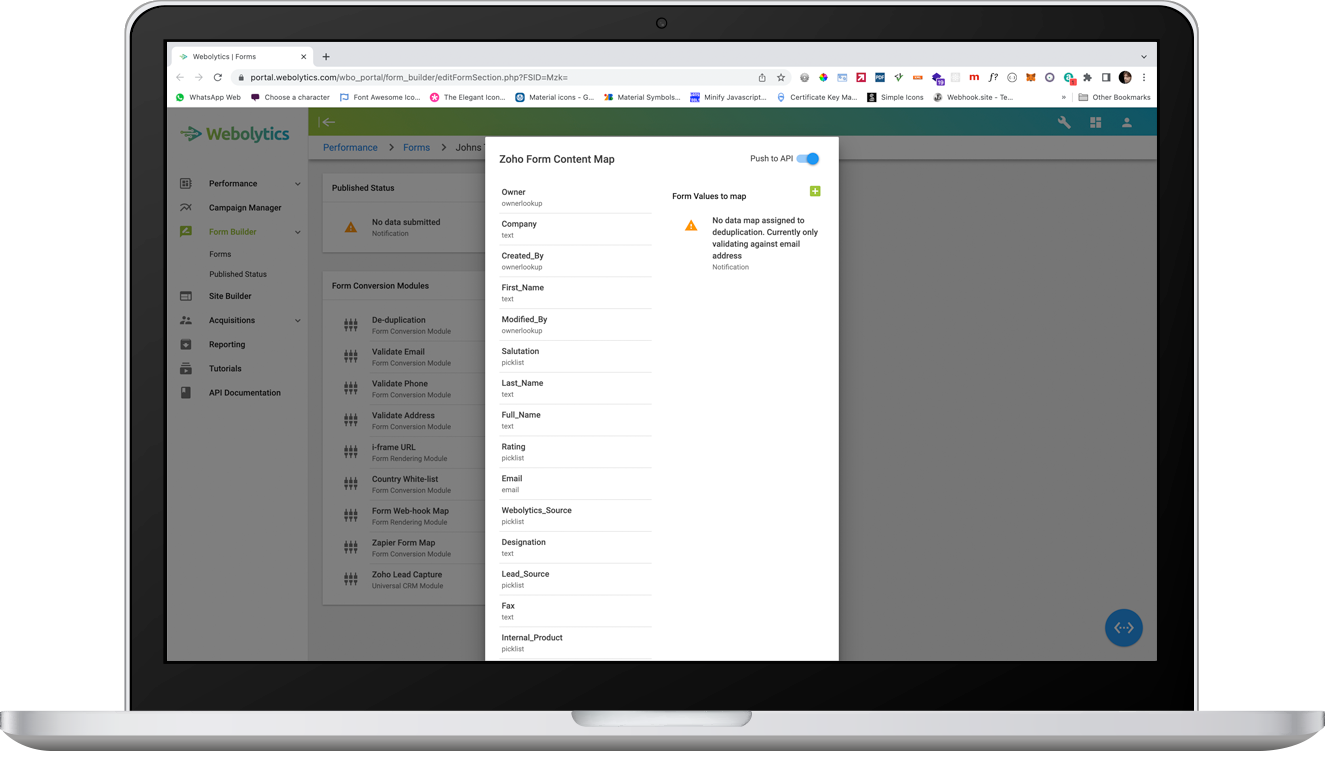
To map form fields to the module, click the green ‘+’ icon. On the select option that appears, select the field that you want to be mapped through to Zoho and then click the green tick icon.
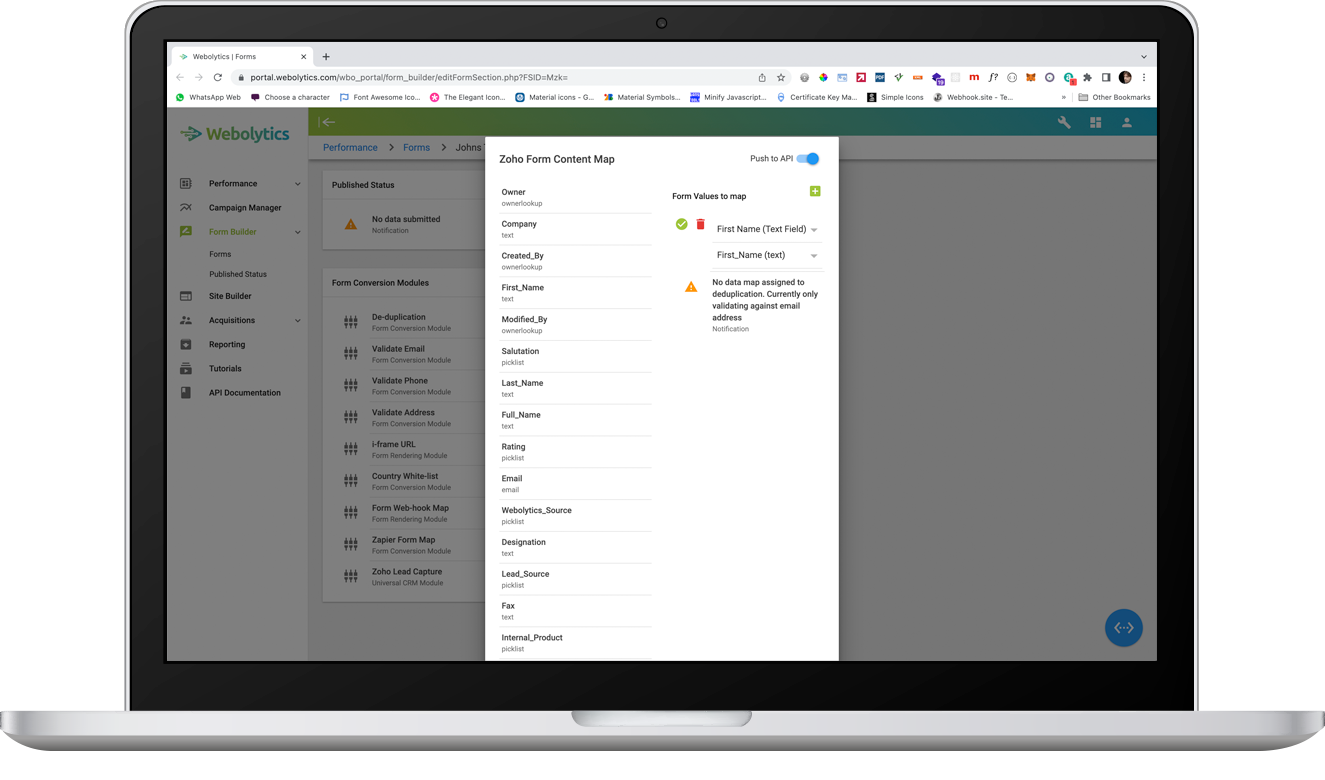
Repeat the process above until all form fields that you want to be included are present.

The form will now push through to the Zoho when a successful lead is submitted. Any leads which fail validation will not be sent through to Zoho.