Web-hook Form Map Module
The Webolytics Web-hook map module is a Form Module that allows data to be sent to a Webolytics form, using bespoke form naming conventions which Webolytics is not expecting with it’s traditional form submission api.
An example of scenarios where this is required would be posting to a form from Zapier, or posting from a bespoke form on a rich landing.
Creating a Web-hook Form module
Go to the Form Builder, and click on the Edit icon and then the Edit link inside the menu.
On the form that appears, scroll to the bottom-left form modules block. Click the Green ‘+’ button in the Form Conversion Modules Block, and select ‘Form Web-hook Map’.

Once created, you will see you new Module in the list on the block
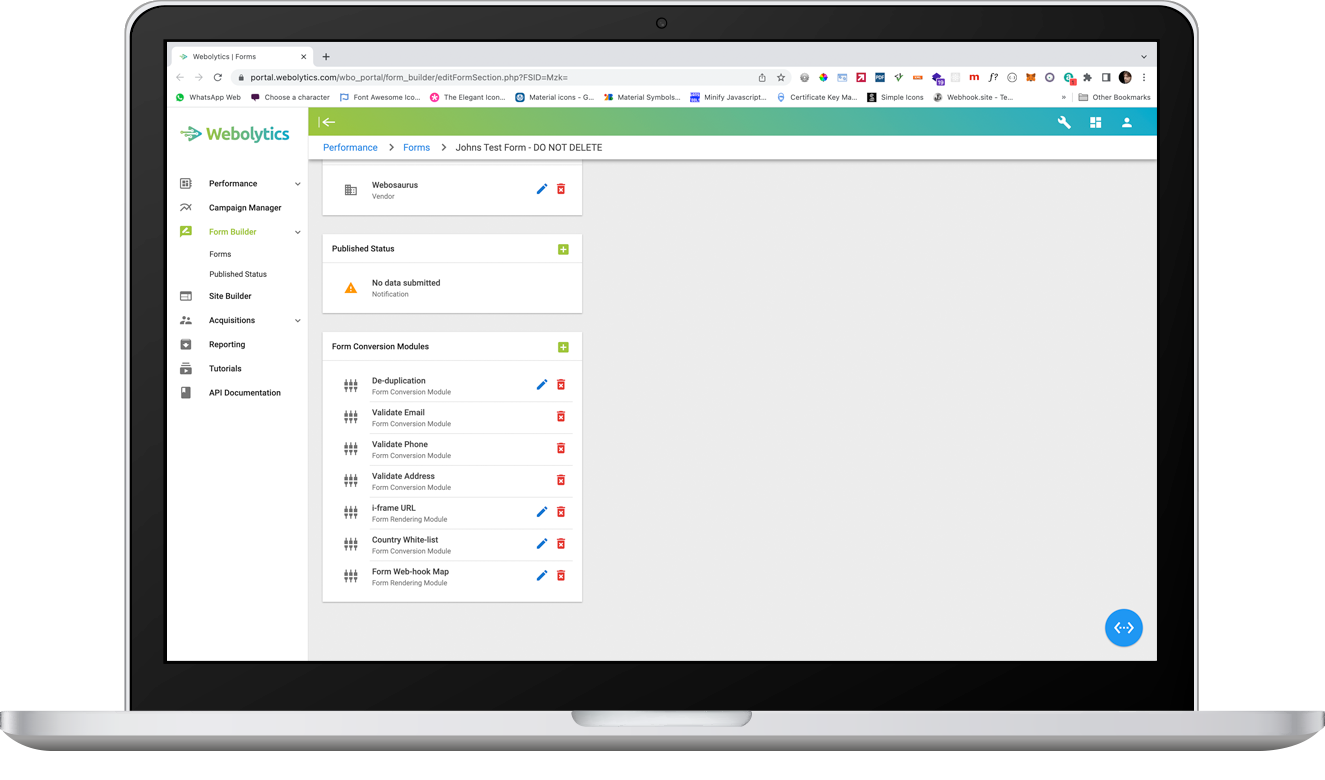
Once a Web-hook Module has been created, it will not be active. This is because no form values have as yet been mapped to it. It should also be noted that the form that has the web hook map assigned to it can still be submitted via the traditional form Submission API.
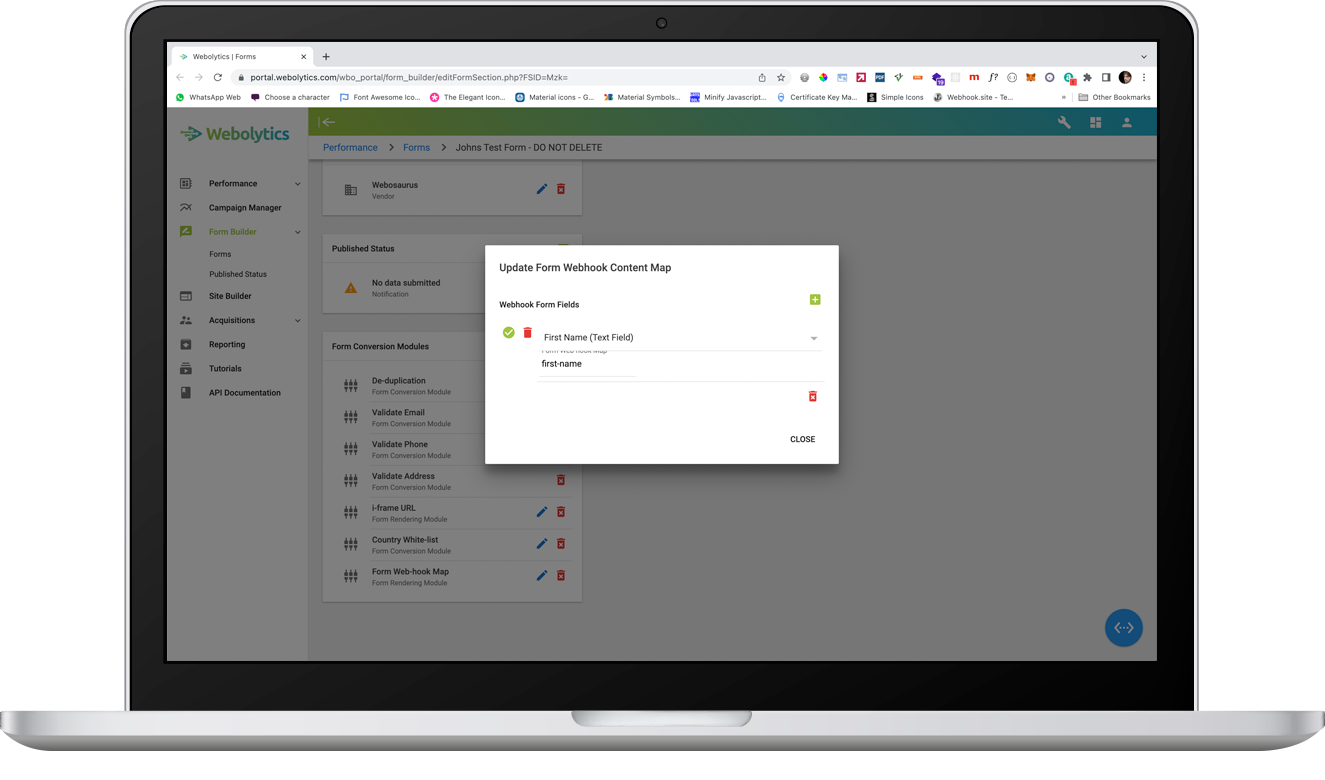
In order for the web hook to be usable, form values will beed to be mapped to it. Mapping form values consists of choosing a form value, and assigning a new name to it (eg: first-name) .
Setting up the Web-hook map
Click the edit icon next to the Web-hook module. This will launch a modal window which allows for control of the module.
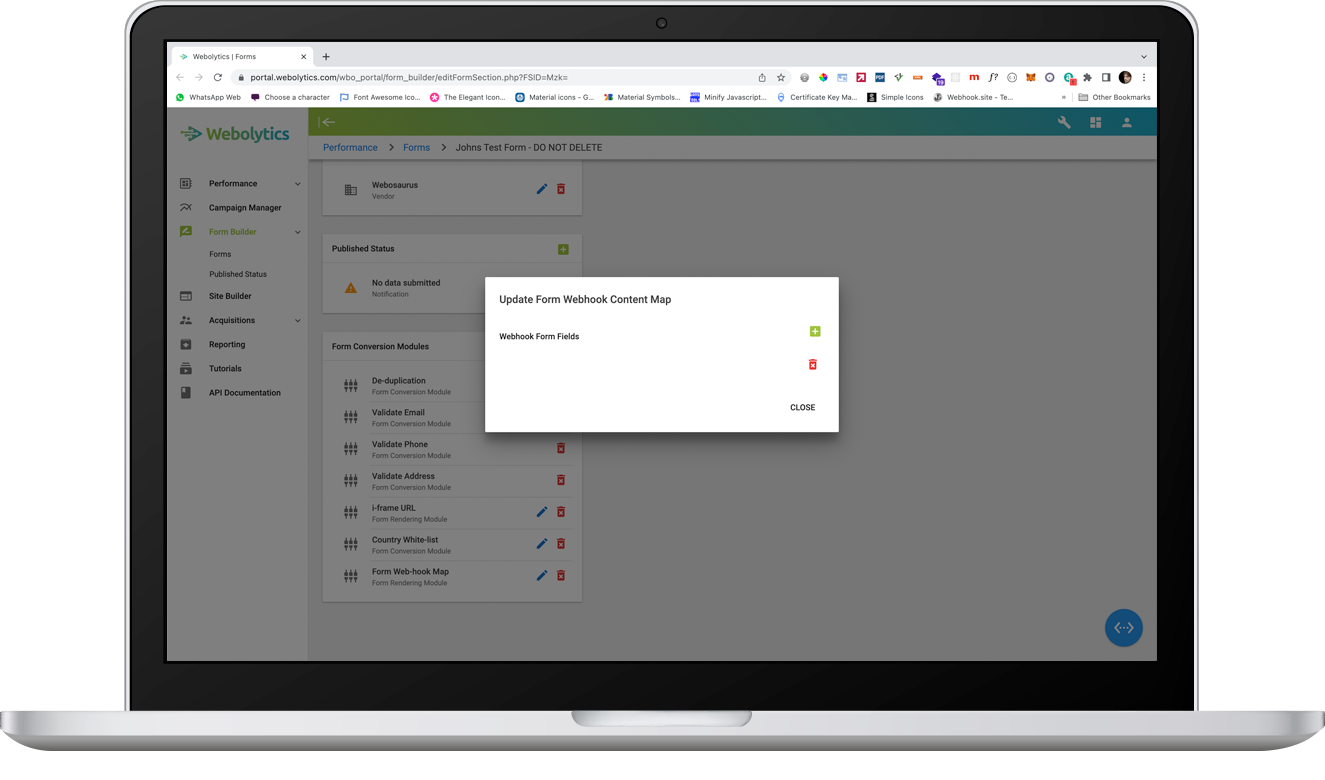
To map form values to the module, click the green ‘+’ icon. On the select option that appears, select the form value that you want to be listed against, and the alias by which the web hook map can interpret it and then click the green tick icon.
Repeat the process above until all countries that you want to be included are present.
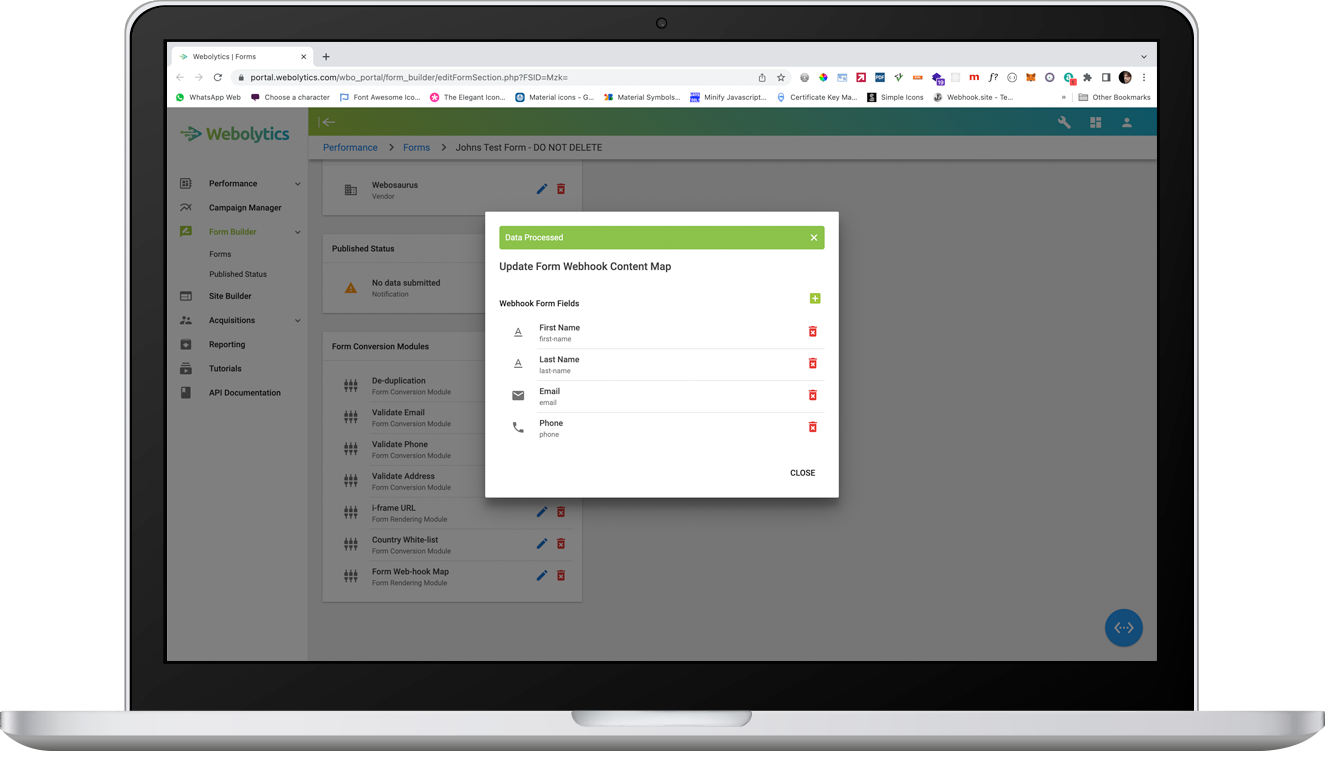
Once the web hook map has been set up, it will be able to be posted to from the Web-hook api. Any campaign group that the form is assigned to will have the Web-hook option next to it for affiliates to use as they desire. Please note, that all fields on the Web-hook that have been defined are mandatory fields, and the Web-hook cannot be submitted with out them being populated.
Using the Web-hook API
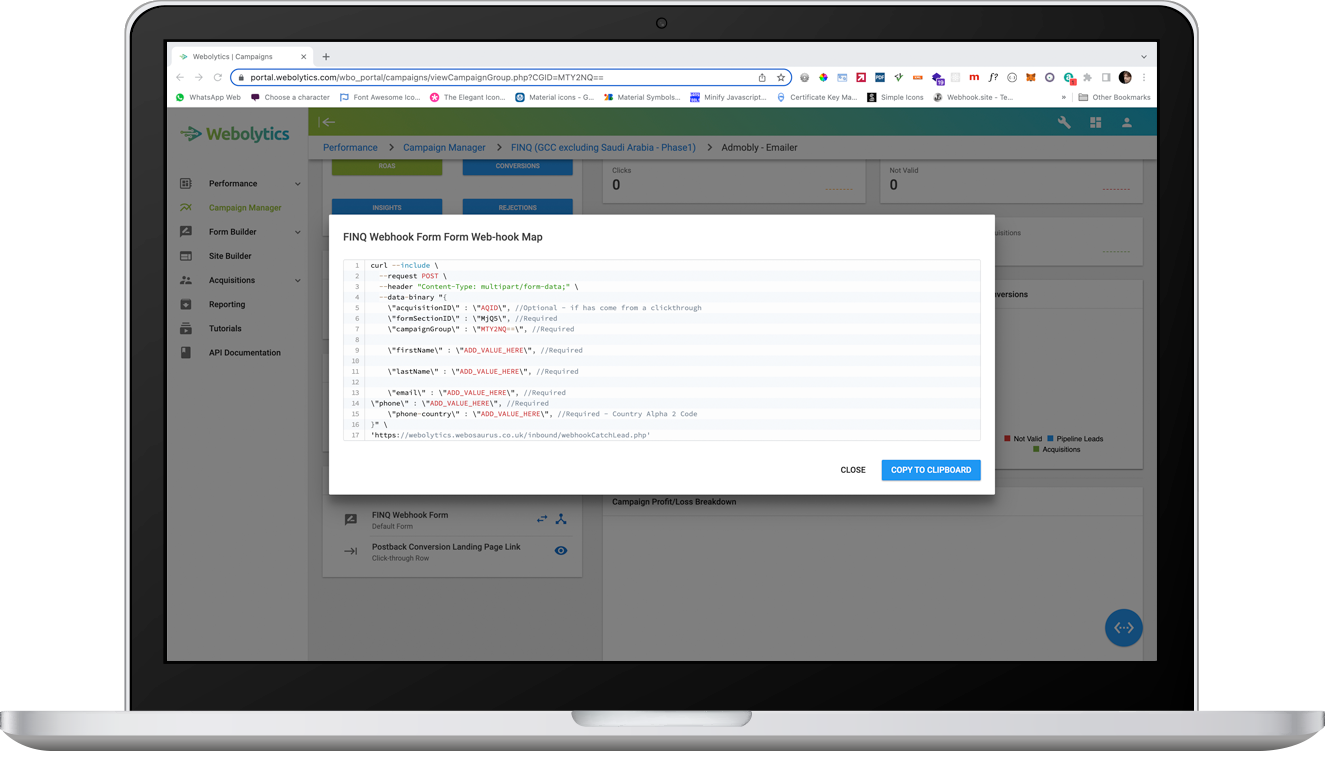
Select your campaign from the Webolytics Campaigns that you have the form assigned against, and select the relevant campaign group. To get the desired Web-hook, click ‘See Web-hook map’ next to the desired form in the resources list.
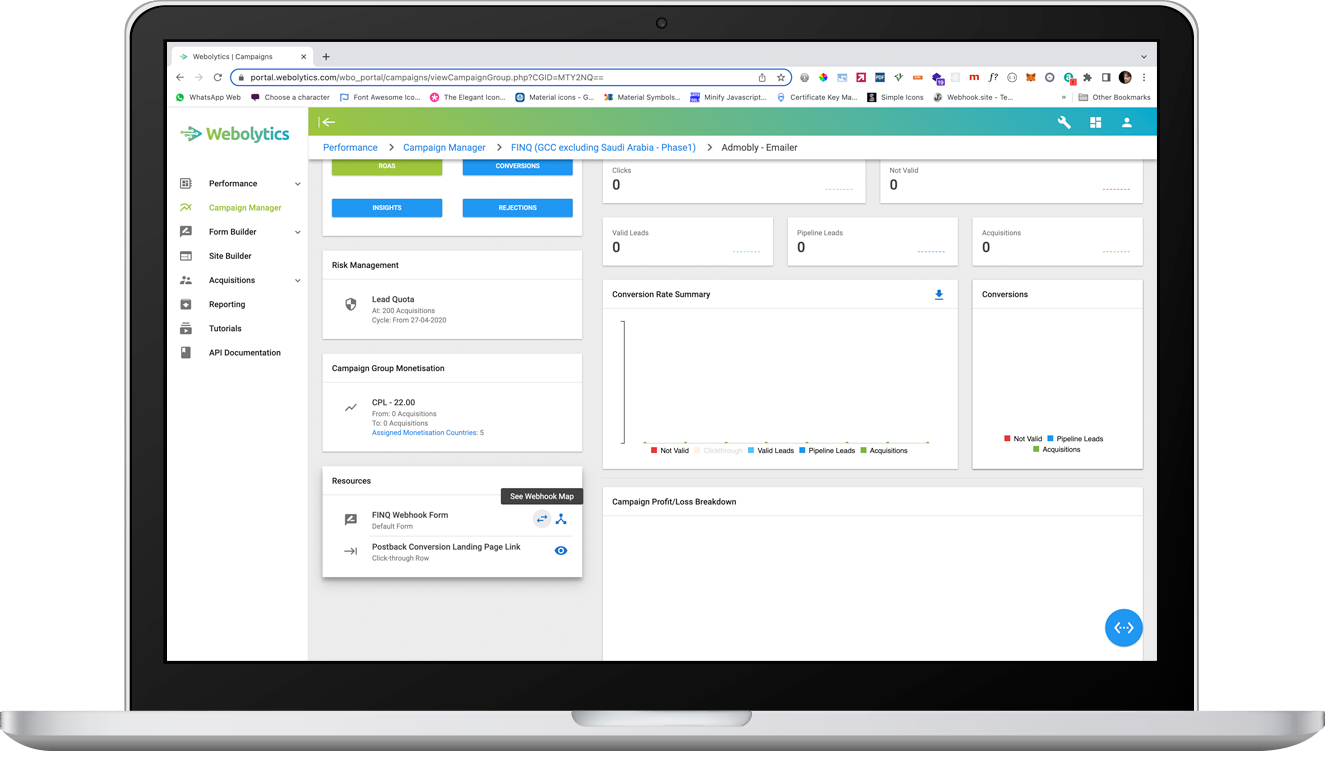
On the following pop-up you will be presented with a curl snippet, which shows the values that needs to be posted through, plus the URL to post to, copy the code snippet and use as desired.