Salesforce Workflows - Process an Acquisition
In order to send conversion and ROI updates from Salesforce to Webolytics, workflow rules will need to be created in Salesforce which send outbound messages back to Webolytics.
Setting up a Process Acquisition Workflow
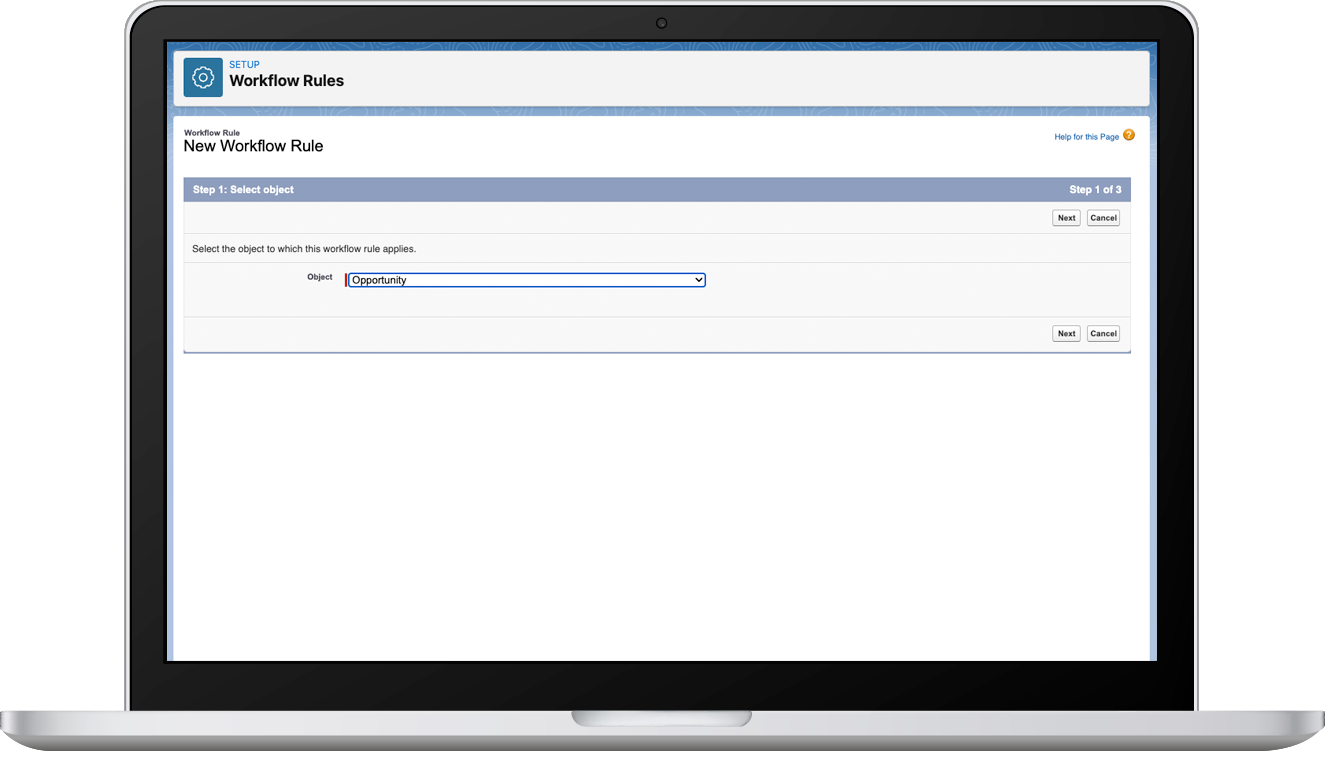
Go to Setup > Process Automation > Workflow Rules, and click ‘New Rule’.
On the 1st step of creating the workflow rule, select ‘Opportunity’ or ‘Account’ (dependant on the Salesforce setup) as the object and click Next. Both work in exactly the same way with Webolytics. For the purposes of this resource, the Opportunity is selected.
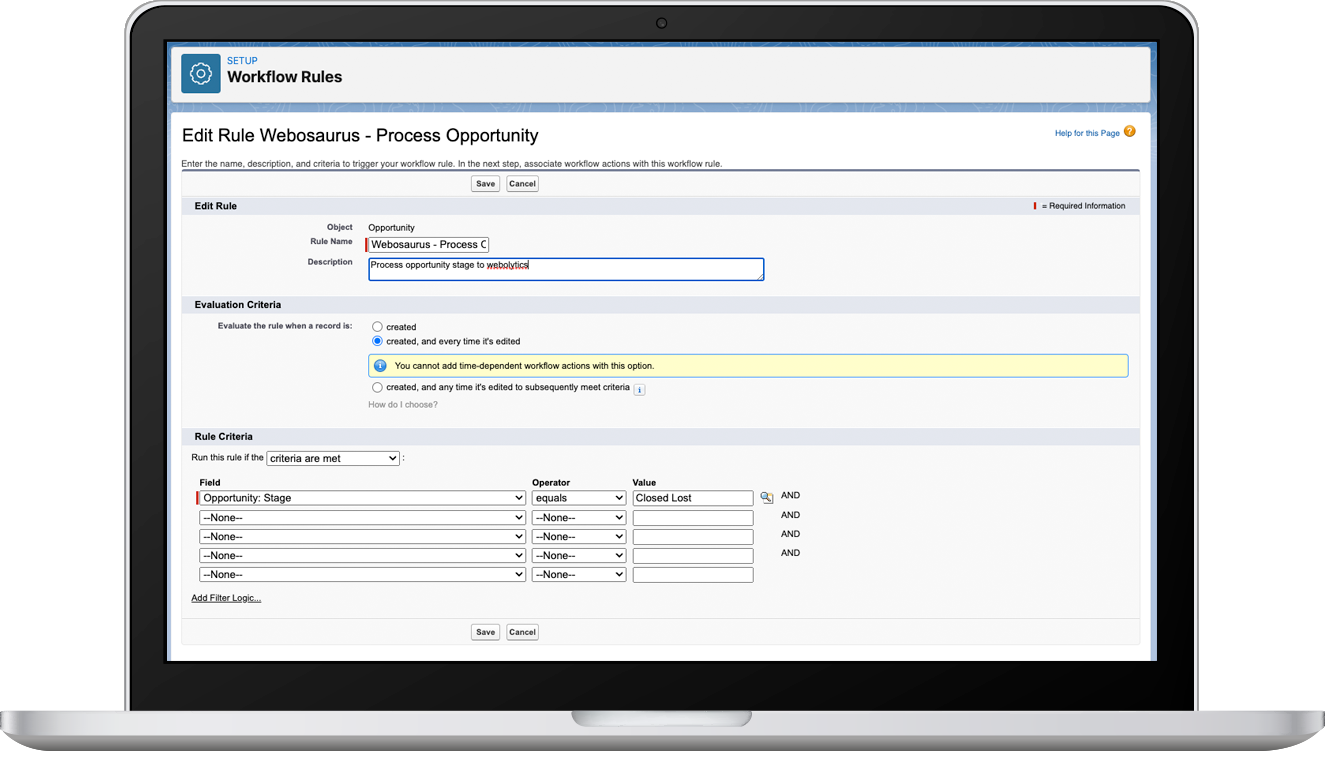
On the next step, populate fields with the following information:
Rule Name: Webosaurus - Process Opportunity
Description: Process opportunity stage to webolytics
Evaluate the rule when a record is: created, and every time its edited
For Rule Criteria, select the rules as required in context to the set up of Salesforce
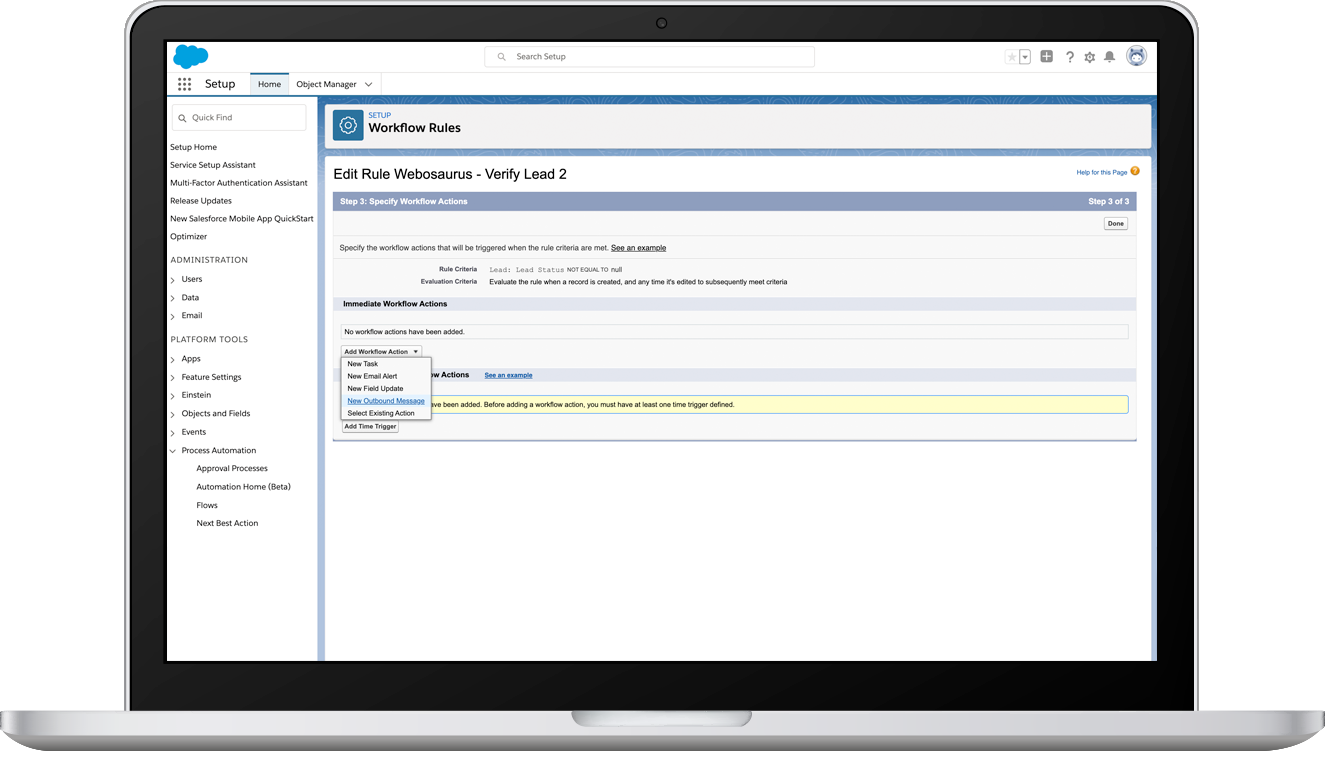
On the net step, you will now need to create the Outbound Message which will be used when ever the status of the Opportunity/Account changes. From the dropdown ‘Add Workflow Action’, select the value ‘New Outbound Message’.
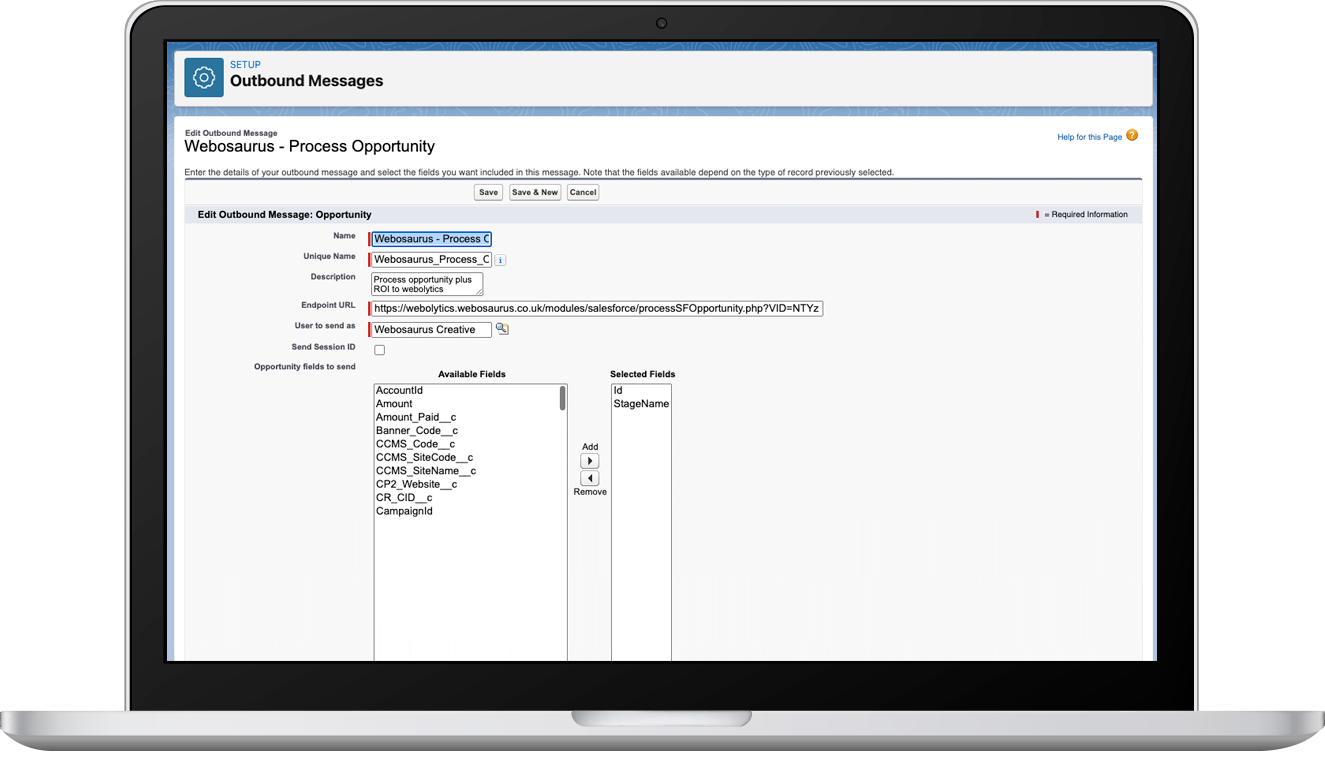
On the following page, populate the form with these values:
Name: Webosaurus - Process Opportunity
Unique Name: Webosaurus_Process_Opportunity
Description: Process opportunity stage to webolytics
Endpoint URL - Opportunity: https://webolytics.webosaurus.co.uk/modules/salesforce/processSFOpportunity.php?VID=YOUR_VENDOR_ID_HERE
Endpoint URL - Account: https://webolytics.webosaurus.co.uk/modules/salesforce/processSFAccount.php?VID=YOUR_VENDOR_ID_HERE
User to send as: Leave as it is. It will select the logged in user as the default
Lead fields to send: This is dependant on the setup of Salesforce. Select the relevant fields as required.
Important: Any mapped fields here for status changed in webolytics will also need to be mapped in the salesforce form module that has been set up
Once finished, click ‘Save’.
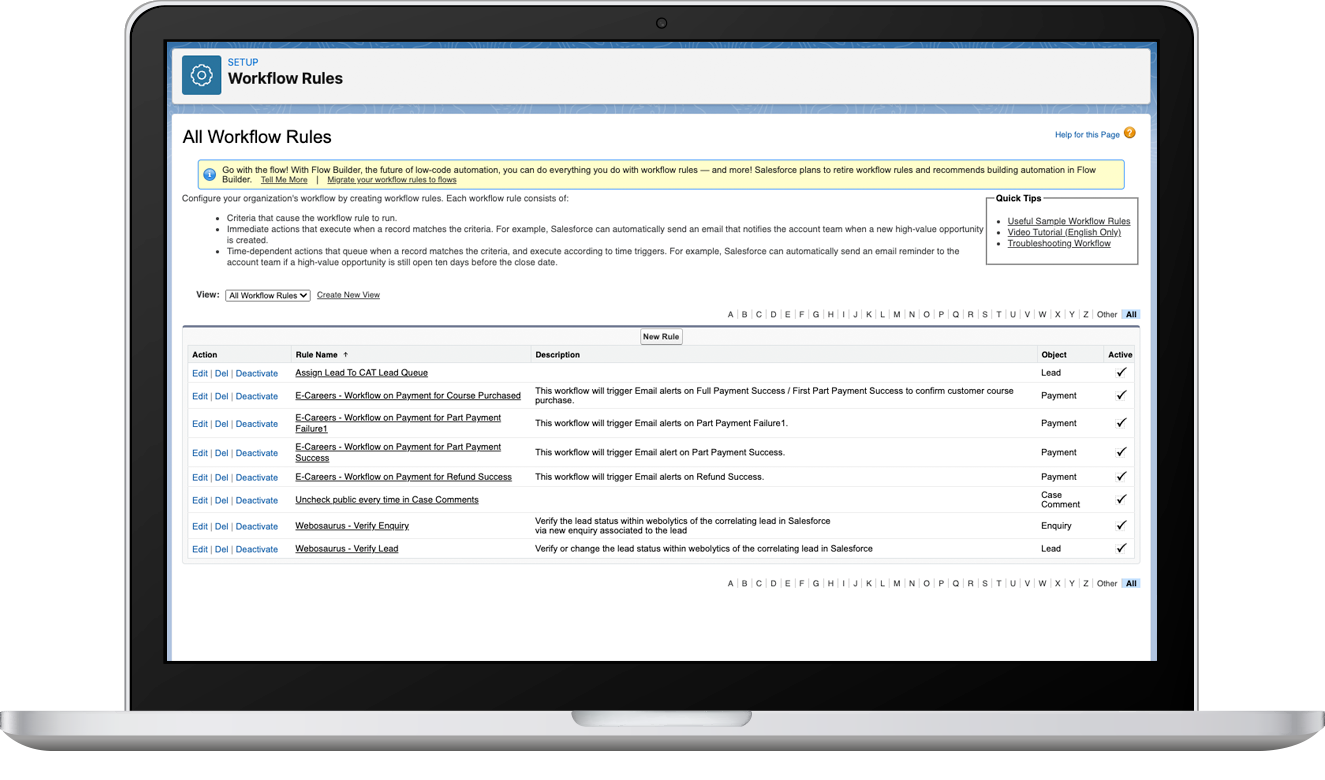
Go back to Setup > Process Automation > Workflow rules , and find the Webolytics Verify Workflow rule and click ‘Activate’ to the left of the record to turn it on.
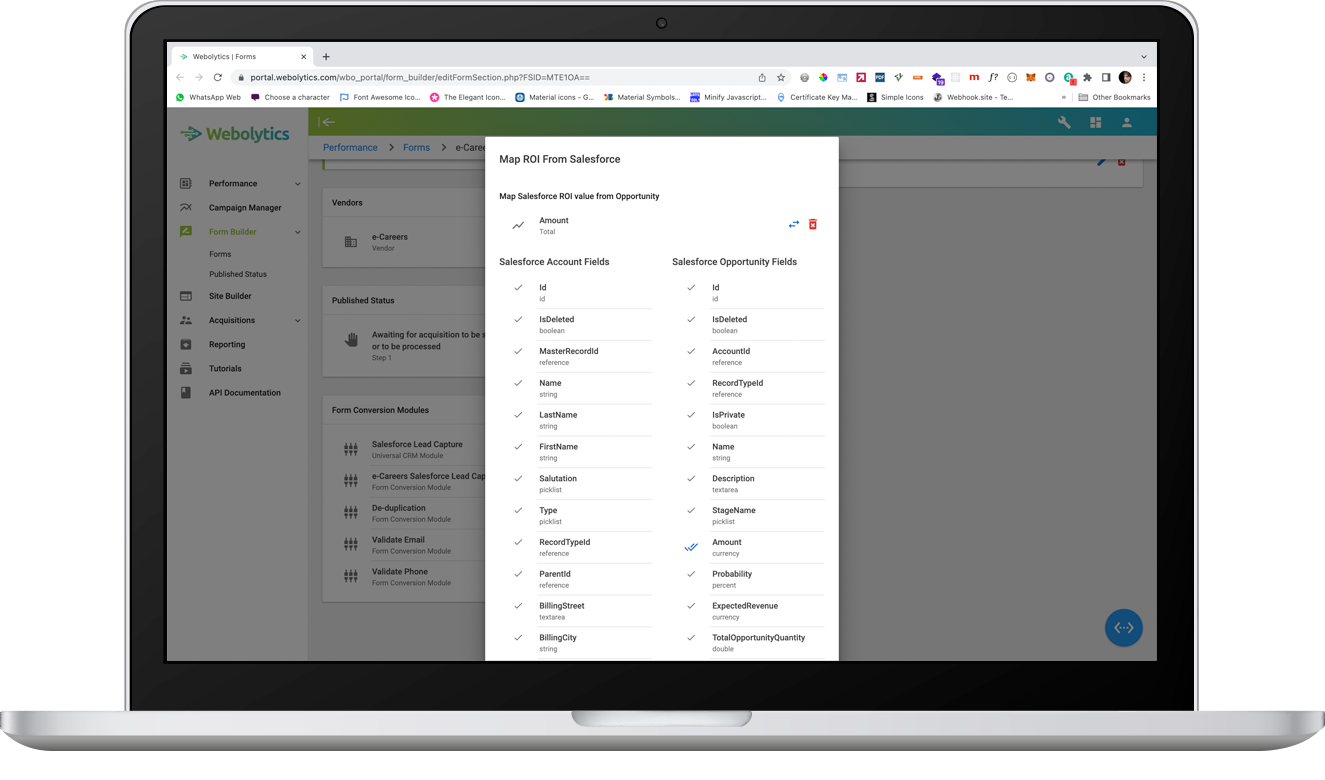
Mapping on Salesforce Form Module
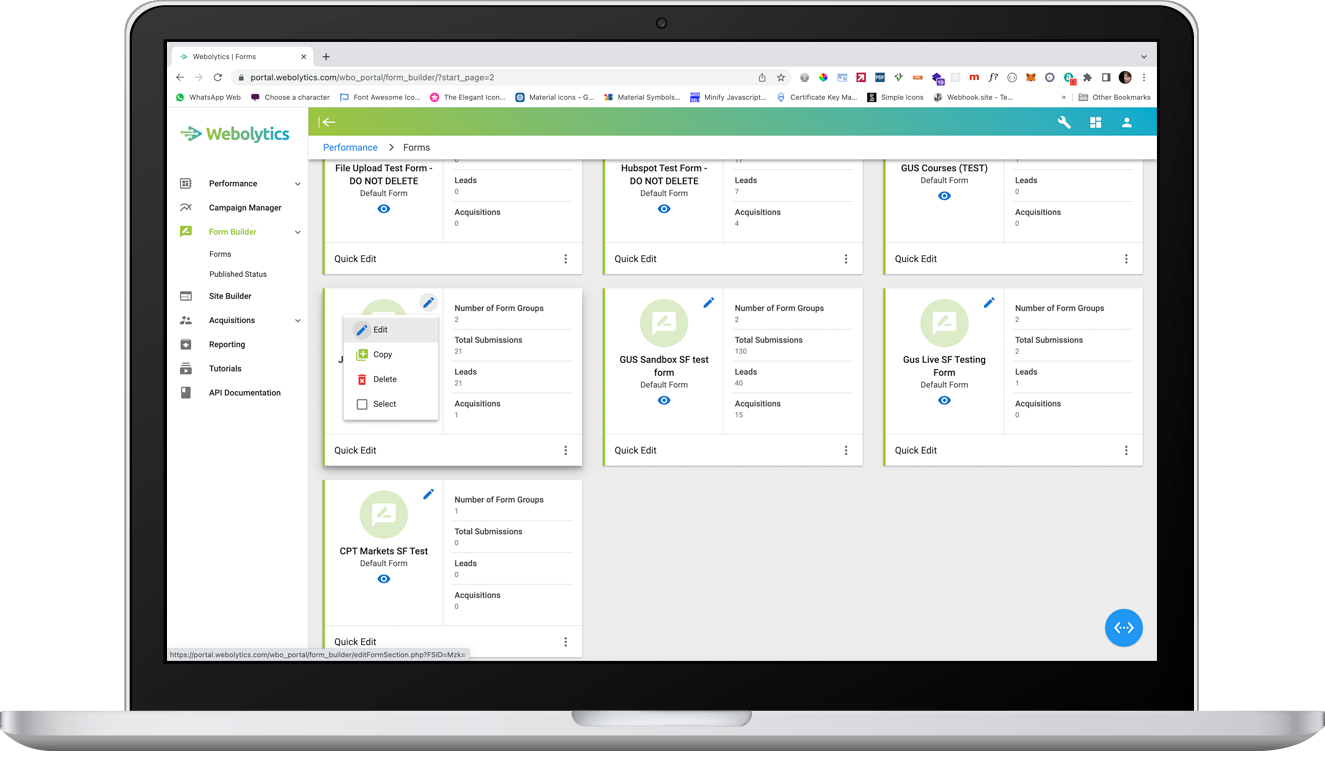
Go to the Form Builder, and click on the Edit icon and then the Edit link inside the menu.
If no salesforce module has been created against the form, do this first. Scroll to the bottom-left form modules block and click “Map ROI From Salesforce”.
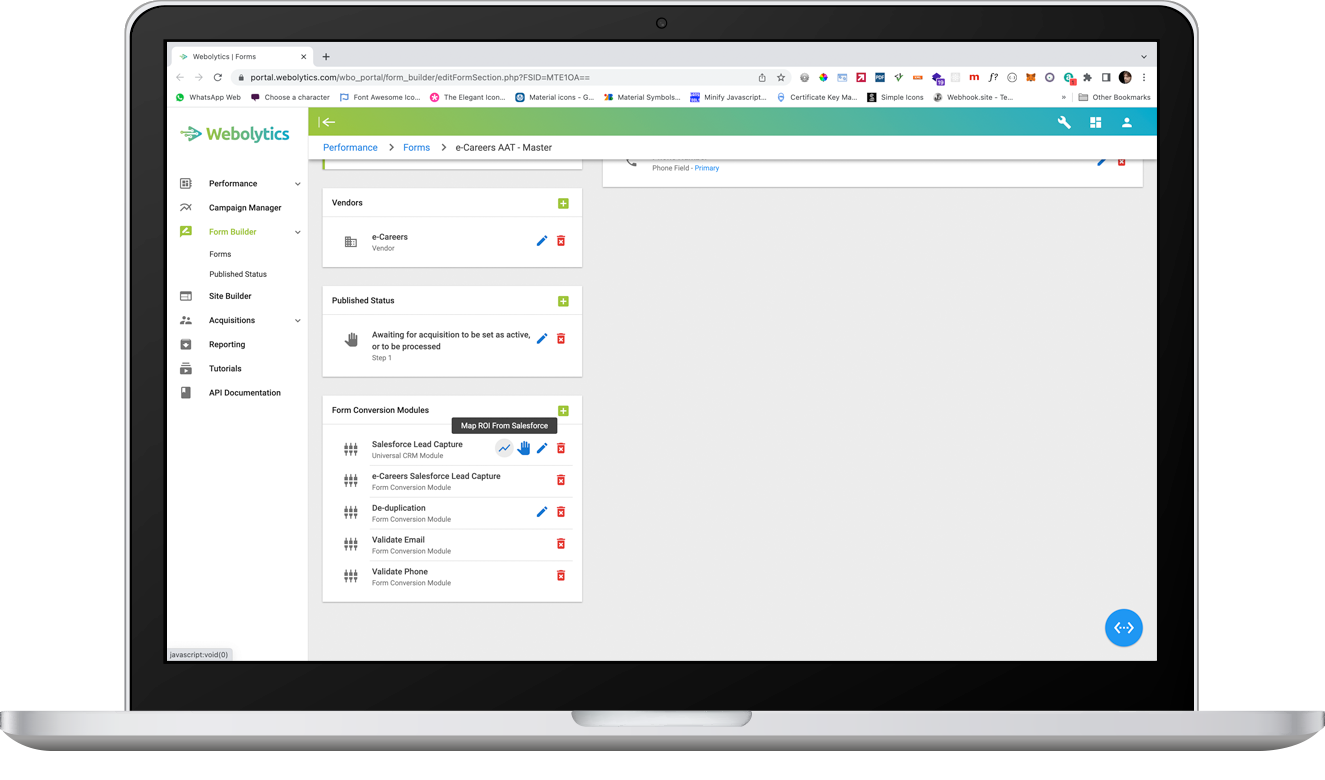
On the modal that appears, make sure that the status fields from the Salesforce Outbound Message are selected (to select a field, click the grey tick to the right of their name).