Lead Squared Automated Tasks - Process Acquisition
In order to send conversion updates and ROI from the sales to Webolytics, an automated task will need to be created in Lead Squared which send webhooks back to Webolytics.
Preparing Webolytics to receive the correct Price fields
Go to the form which has been assigned with a lead squared module, and click on the “Map ROI From Lead Squared Icon”

On the modal window, click the tick icon next to the field that will be used in Lead Squared for revenue
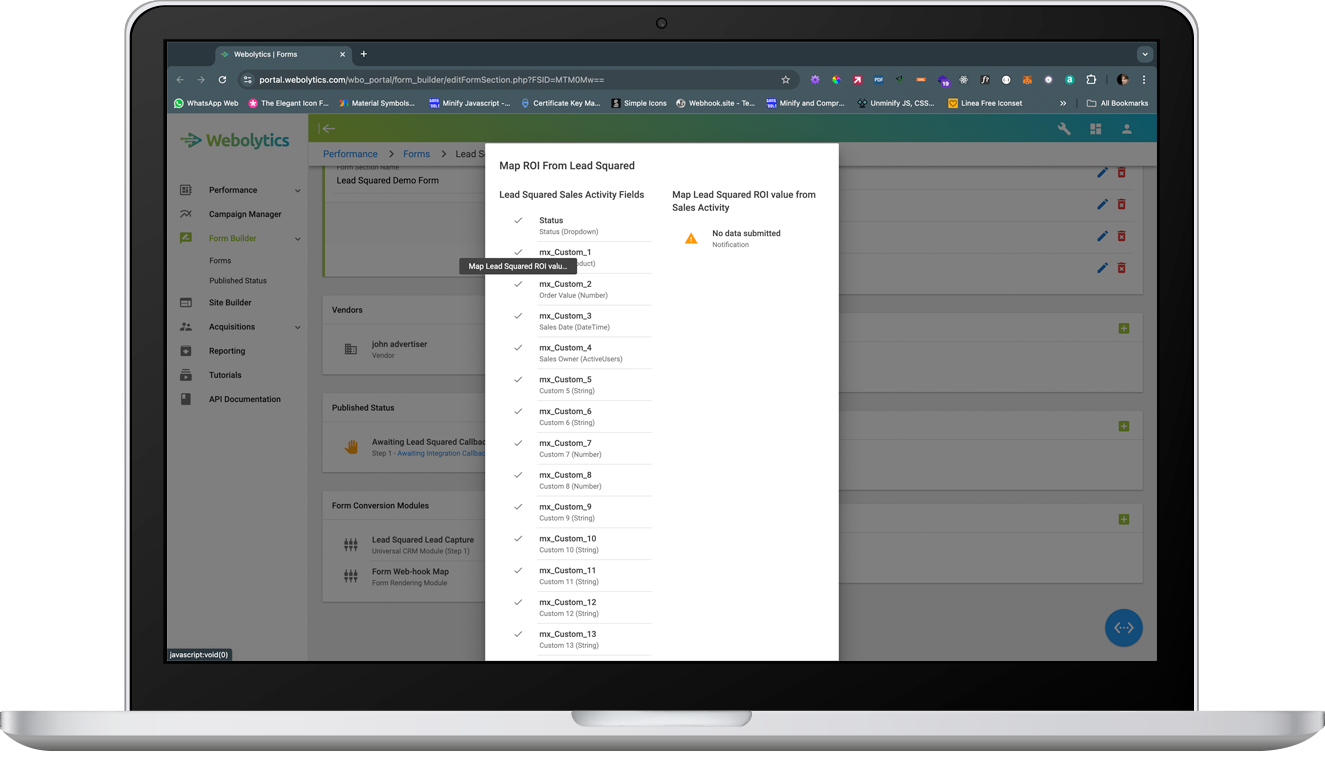
Once selected, you have the choice to turn the value from a Cumulative value to a Total value. If the value is set as cumulative, then each sale will be treated in isolation, and accrue against the acquisition as they occur. If the value is set as a Total value, then the acquisition will add/subtract from the current ROI against the acquisition in webolytics so that it matches the value coming over as a Total ROI. To toggle between the 2, click the option next to the mapped row field.

Once the form is setup then you are ready to go into Lead Squared and set up a new automation.
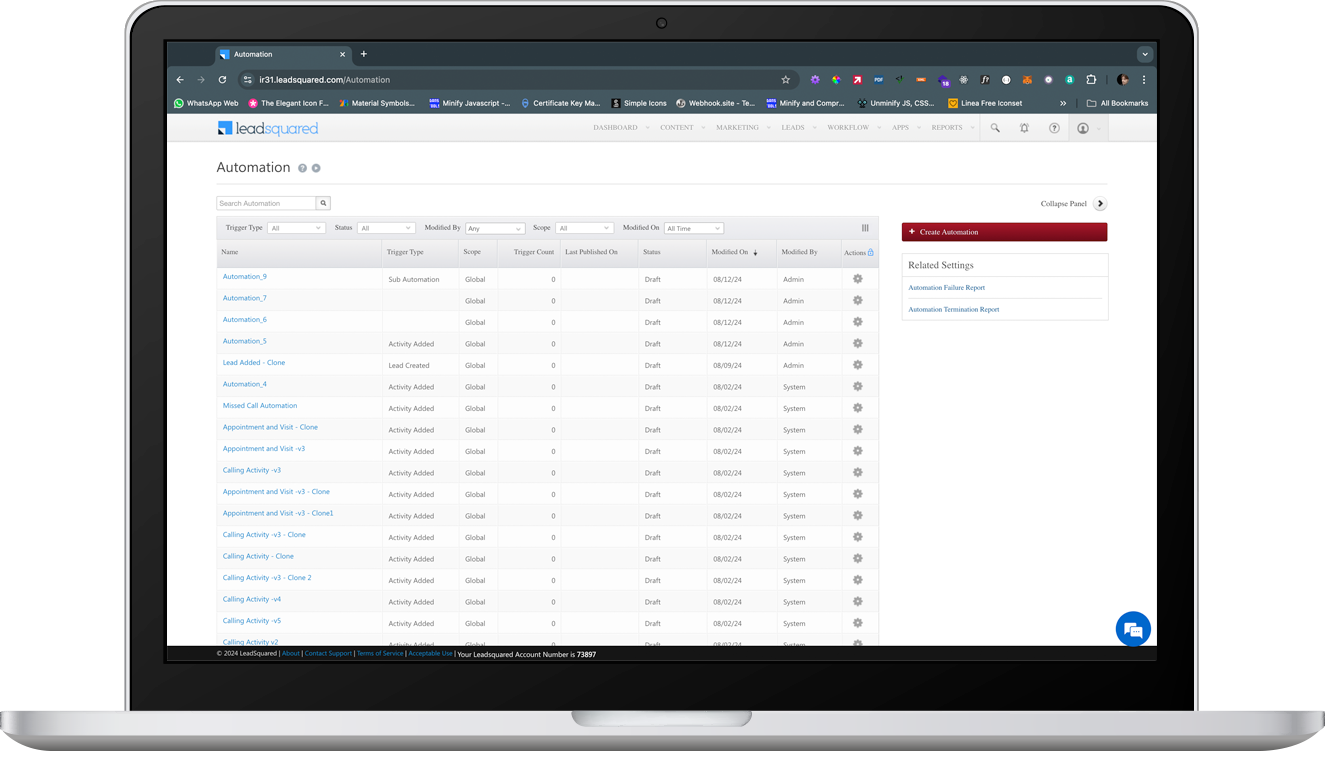
Setting up an Automated Task
Go to Workflow > Automation, and click ‘Create Automation’.
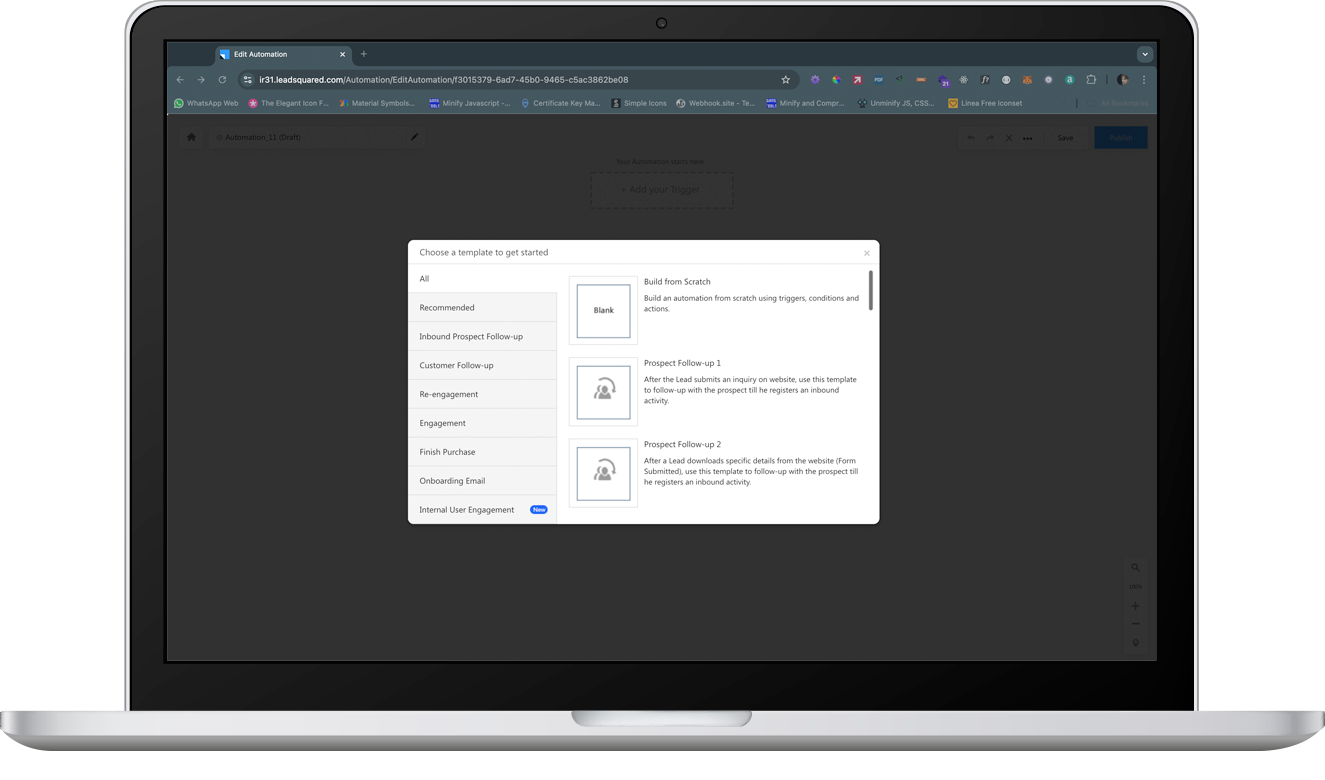
On the 1st step of creating the automation rule, select All > Build from Scratch.
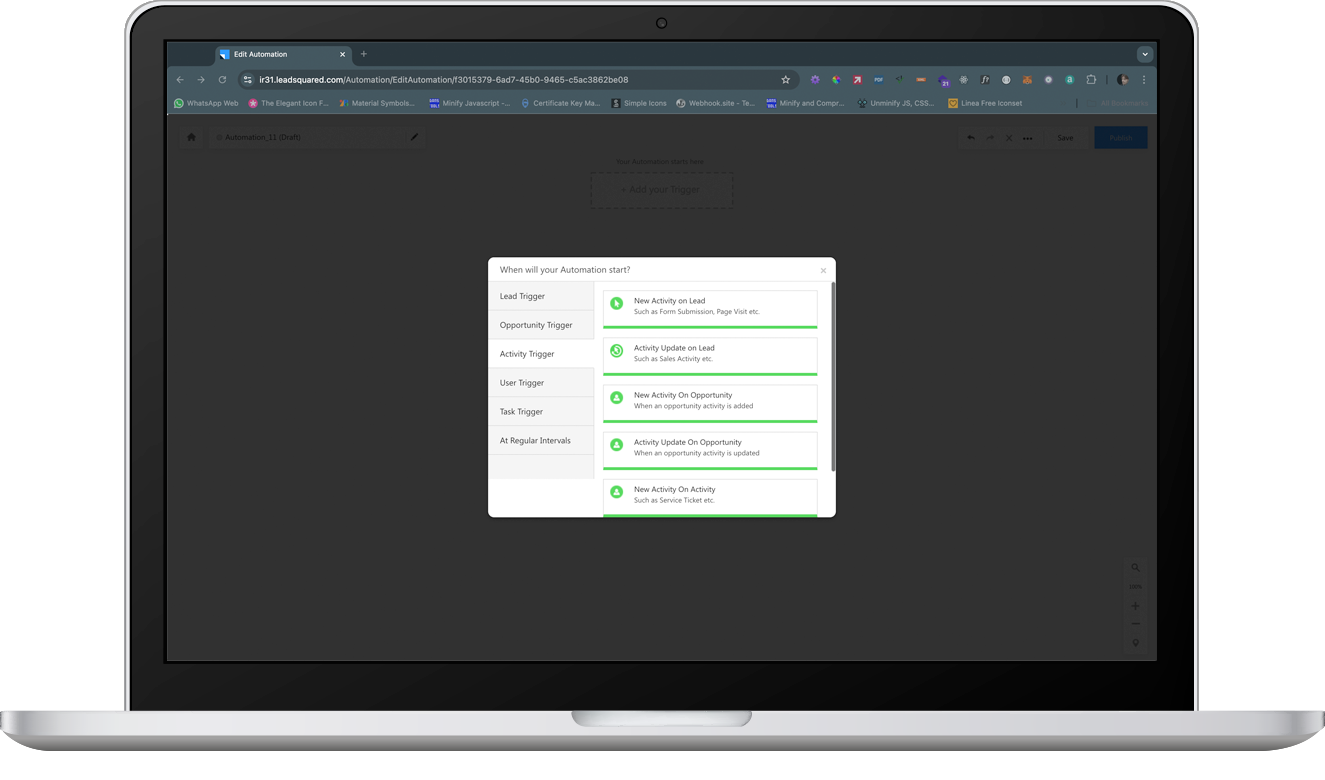
On the 2nd Step of creating the Automation, choose Activity Trigger > Activity Update on Lead.
On the 3rd step, choose the activity Type. The types of activity will be subject to the existing Lead Squared Setup, for the purposes of this tutorial we have set to apply to All Leads. Change these settings as applicable to your organisation’s set up.

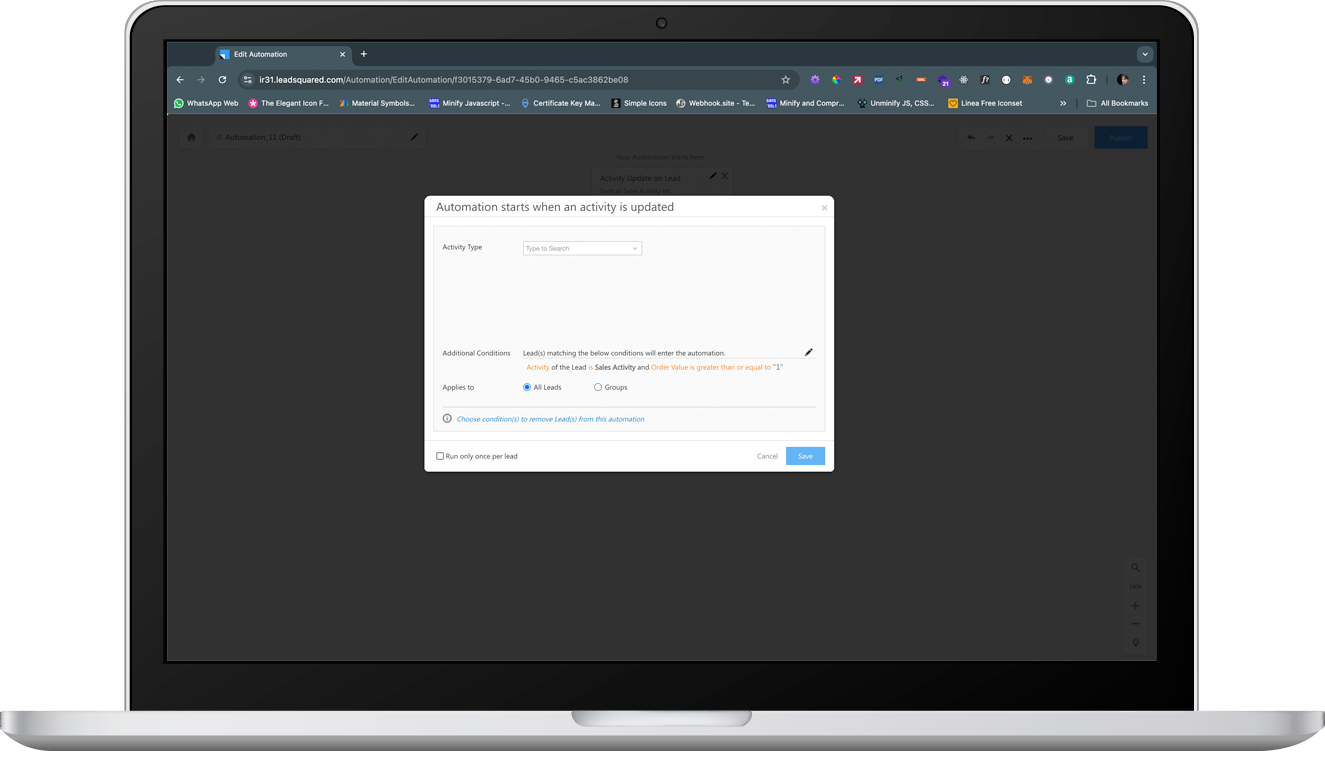
In ‘Additional Conditions’, click ‘+Add Condition’ and select the Activity Type as ‘Sales Activity’. You also have the option to place a condition on the Order Value. This is option but for the purposes of this tutorial, we have set the Order Value to be greater than or equal to 1. Once finished, click ‘Add Condition’.
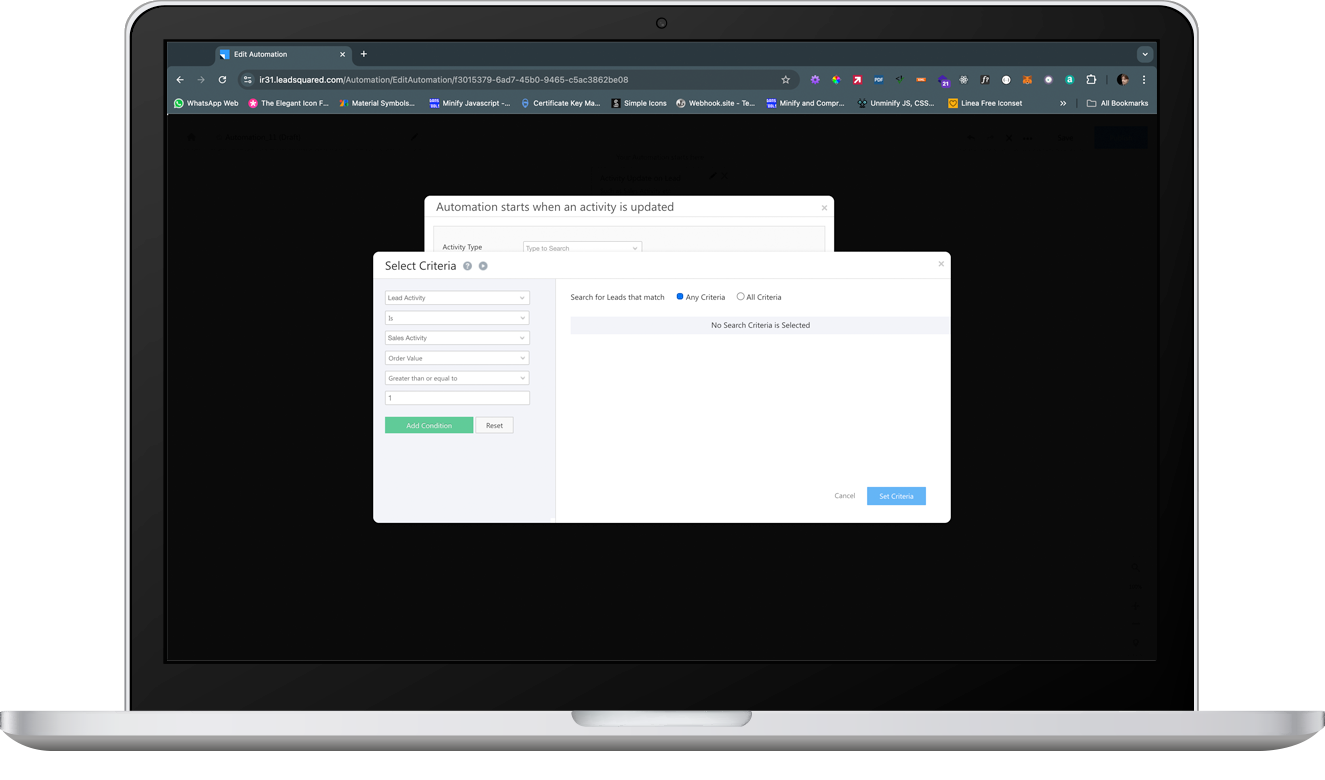
Once you have set your conditions, click ‘Set Criteria’.

On the automation window, click ‘Save’.
You are now ready to compete the Automation.
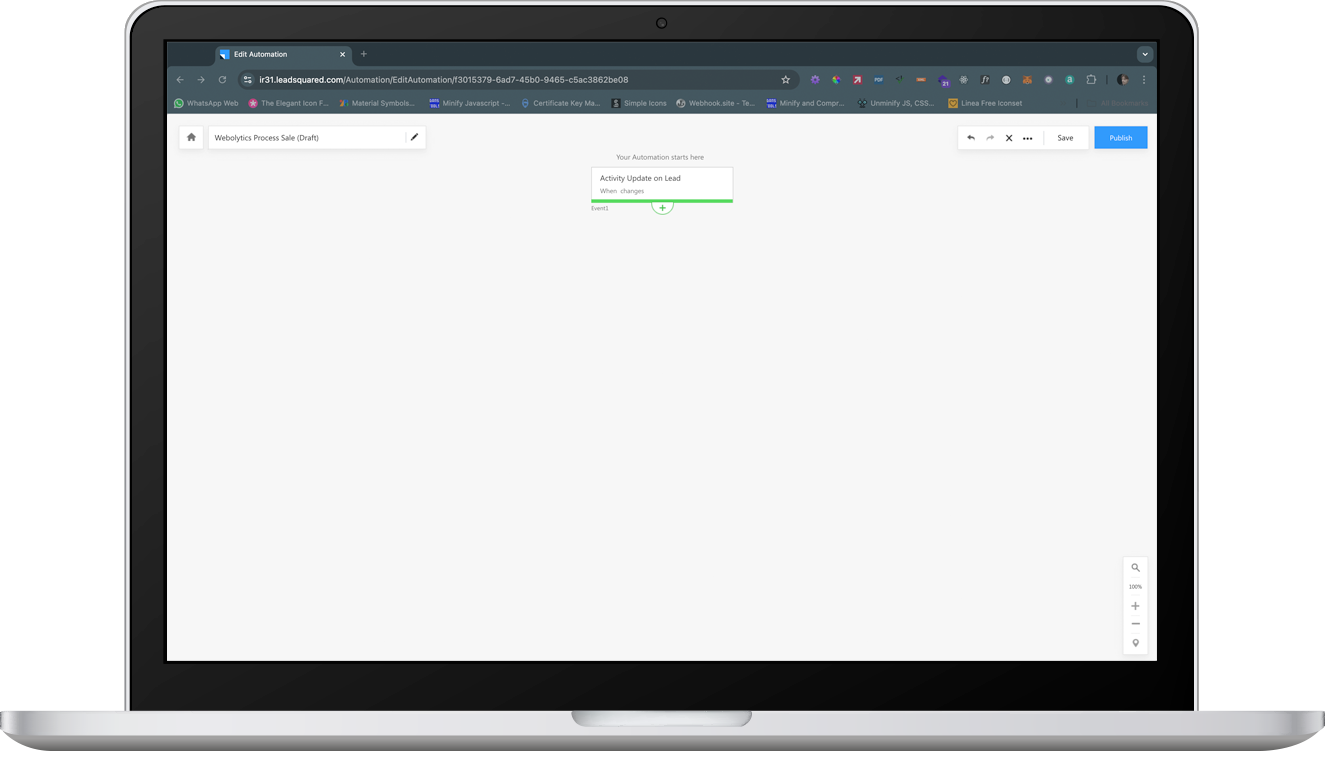
Click the ‘+’ icon underneath you starting automation block, and got to Custom > Webhook.

On the modal window, Name you web hook as desired and populate with the following information:
Name: Name as desired
Webhook URL: https://portal.webolytics.com/modules/lead-squared/processAcquisition.php?VID=ADD_VENDOR_ID_HERE
Content Type: application/json
Custom Headers: No custom headers are required
Once finished, click ‘Save’

Once completed, click ‘Publish’ to the top right of the screen.