Forms
Learn how to add new Form sections and edit the form.
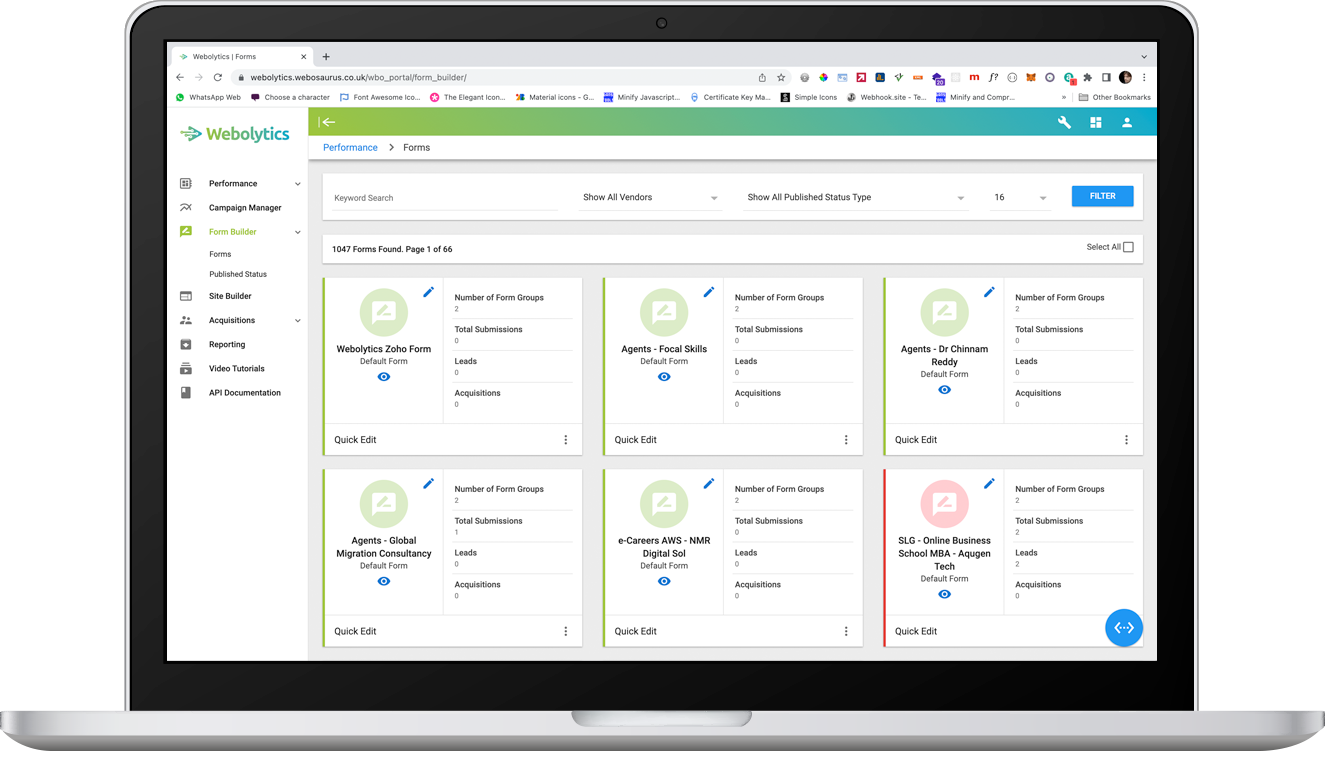
To create a form in Webolytics, select “forms” from the menu on the left.
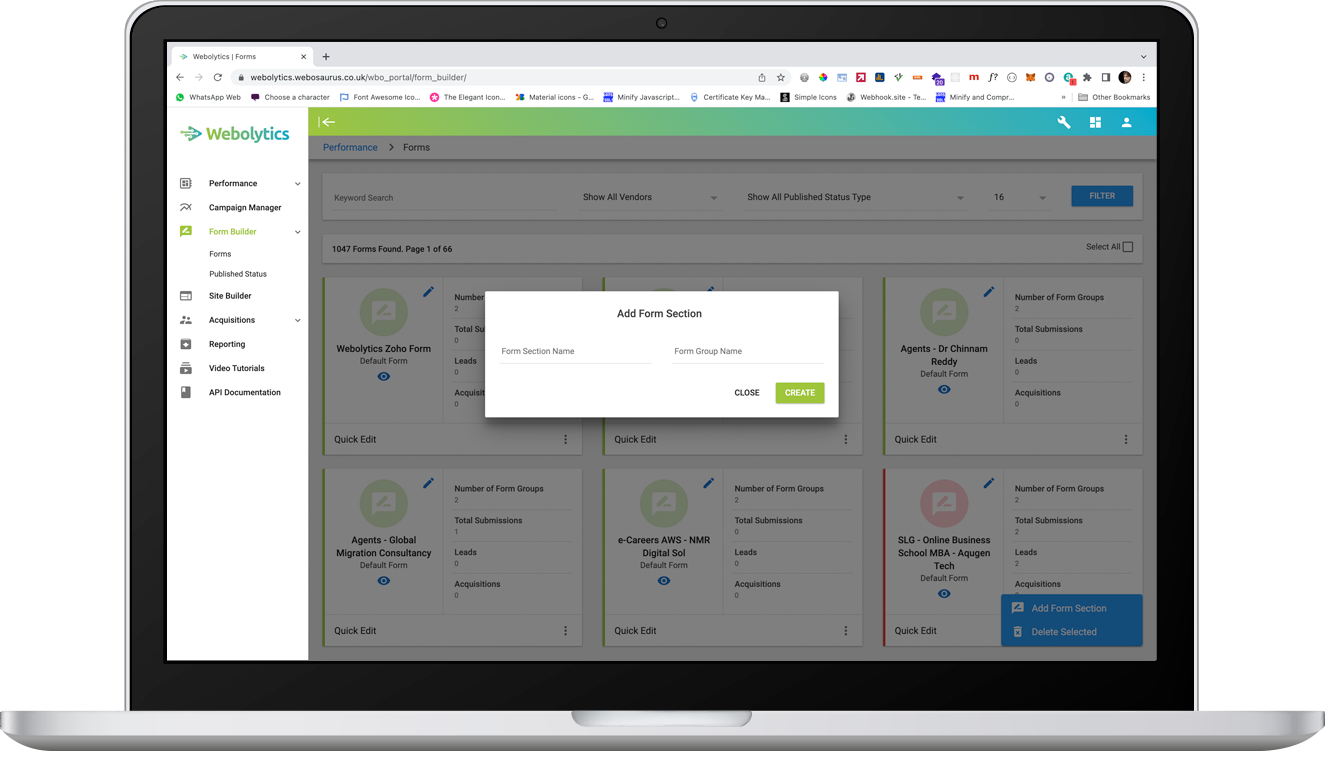
Click the blue button in the bottom left corner and select “Add form section”.
Input the name of your form in the left text box, then input the type of text you want to call the first stage of fields on the form you are creating into the right text box and click create then edit to go to the created Form.
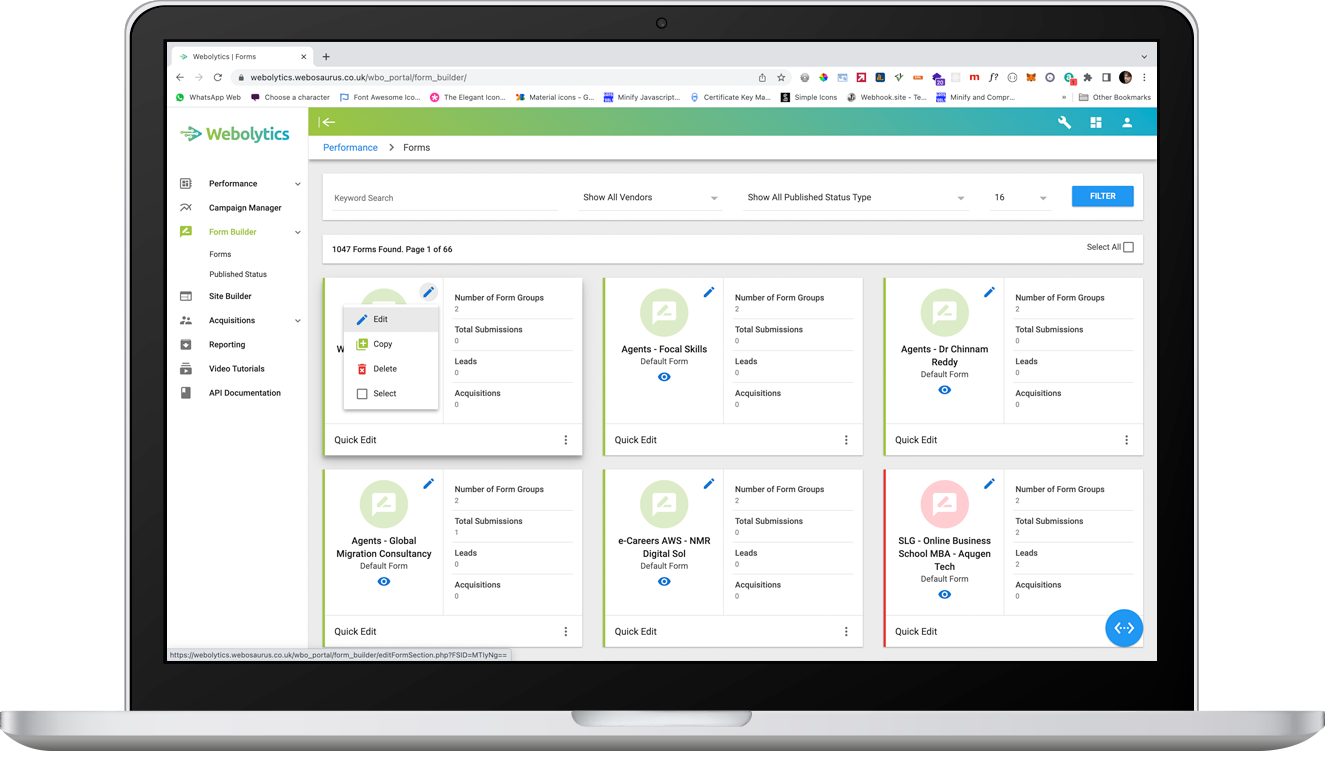
In this section click on the blue pencil tool in the top left corner of your new form and select “Edit”. Also you can Copy Forms and when you do this it will create a copy of the form which will have the name of the original form with copy added to the name text. (please note that this is an exact copy so if you do make a copy please be sure to edit the form after copying it)
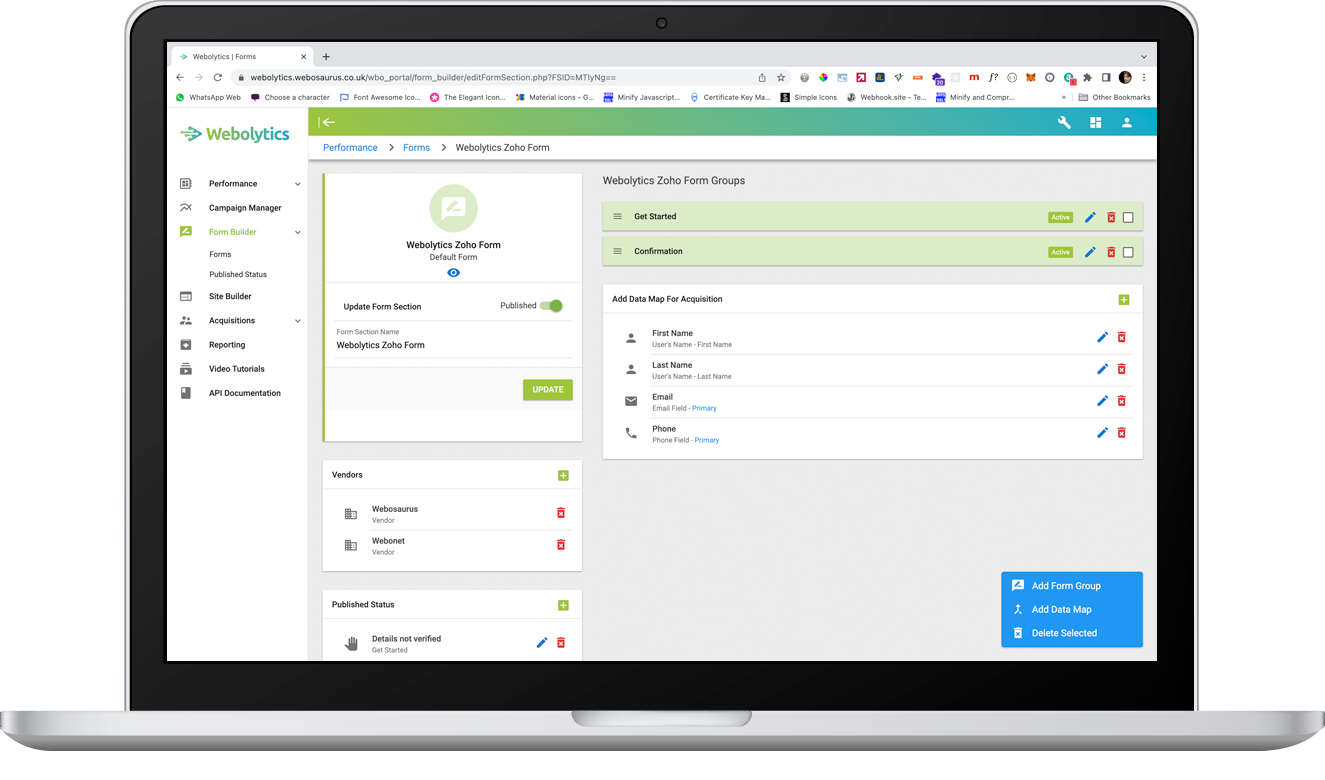
In the edit section of the Form you will have a number of sections that can be edited and added to.
First is the Update section where you can un-publish the form and change the name of the form.
Then the Vendors section where you add or remove any Vendors that you have created previously, please note that to add a vendor to the campaign group you will have to add the vendor here first.
Then you have the Publish status section this is where you can add a types of status`s for Acquisitions.
Next you have the Form Conversion Modules section where you add Selected Modules to the form.
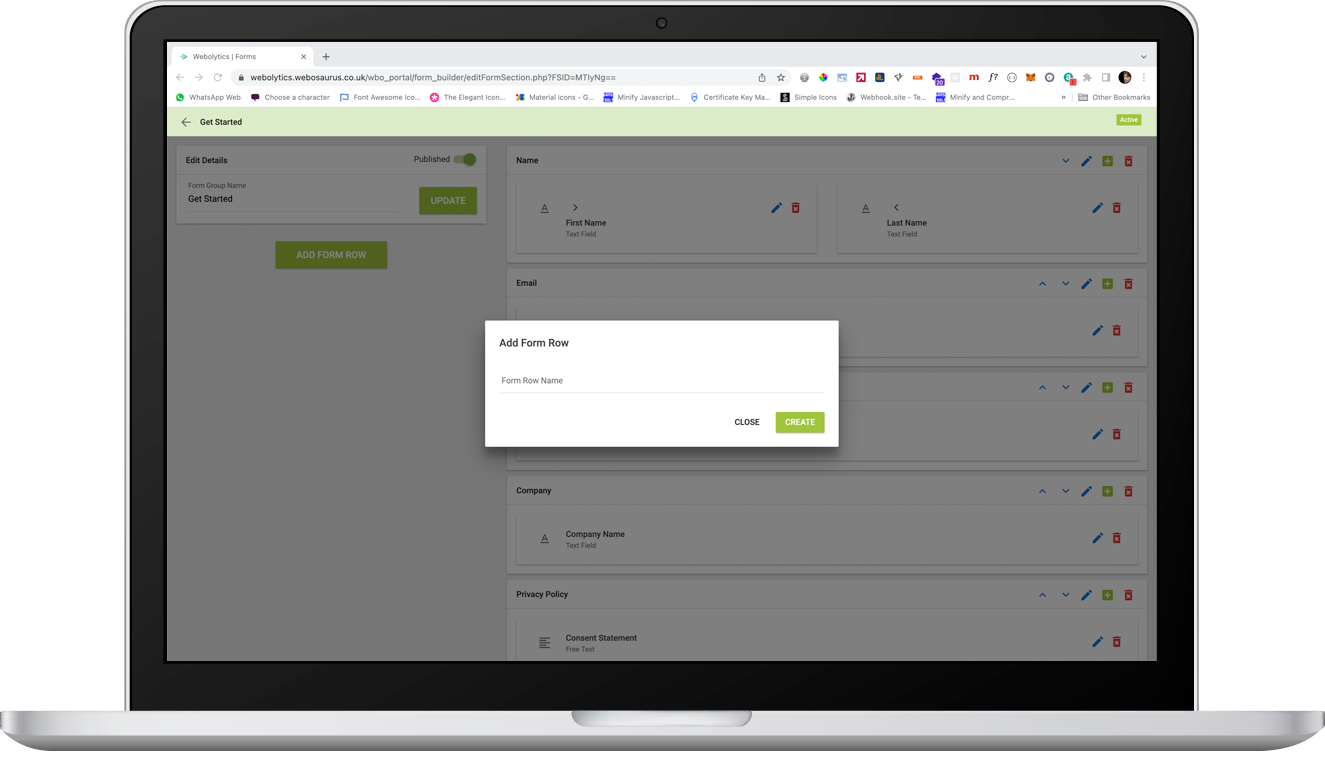
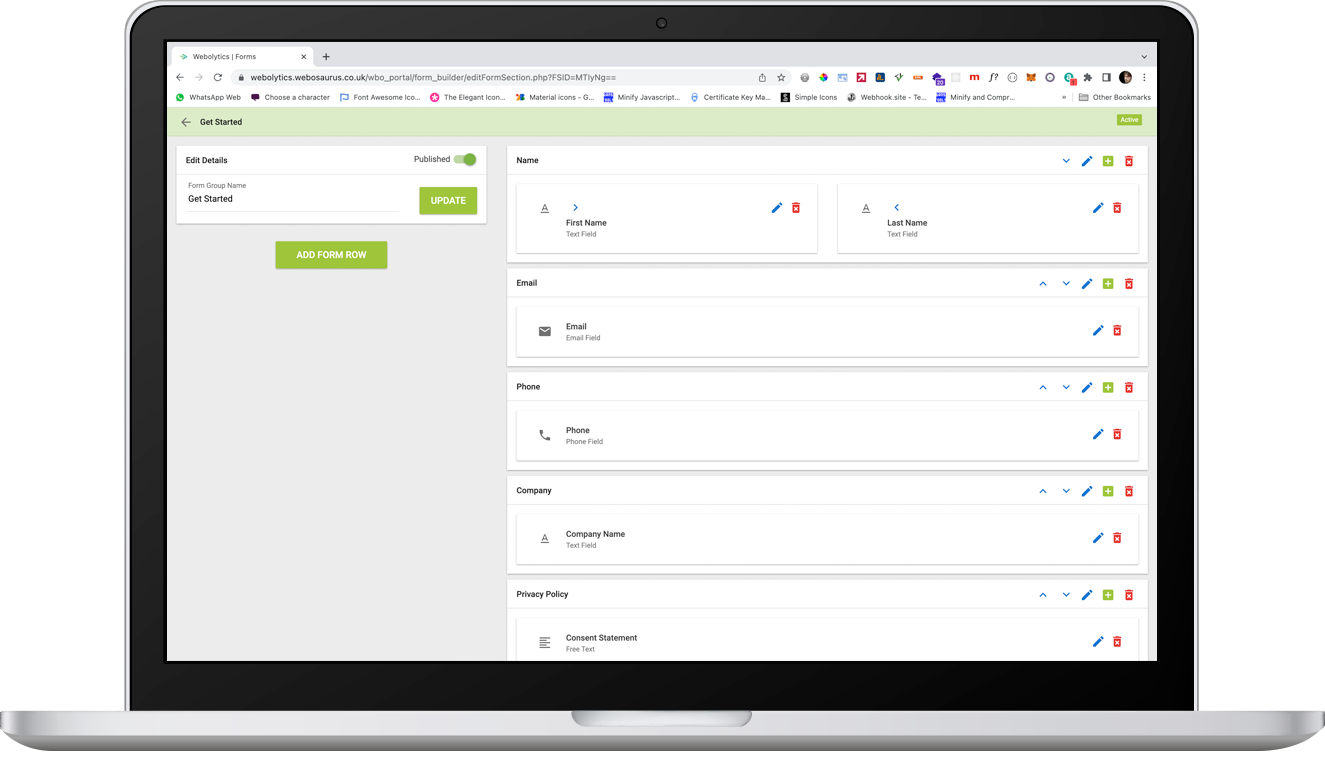
The next section is the “Form Group” section this will already have a Form group made when you created the Form here we called it stage 1 you can edit this section to add fields to the form by clicking on the blue pencil icon.
In this section you can add form rows by clicking “ADD FORM ROW” then add your desired name of the row.
Then you can add the desired name of the field that you want added and select what type of field you will want to add from the select box. Please note to select the required tab for Fields that are required for the form you are creating.
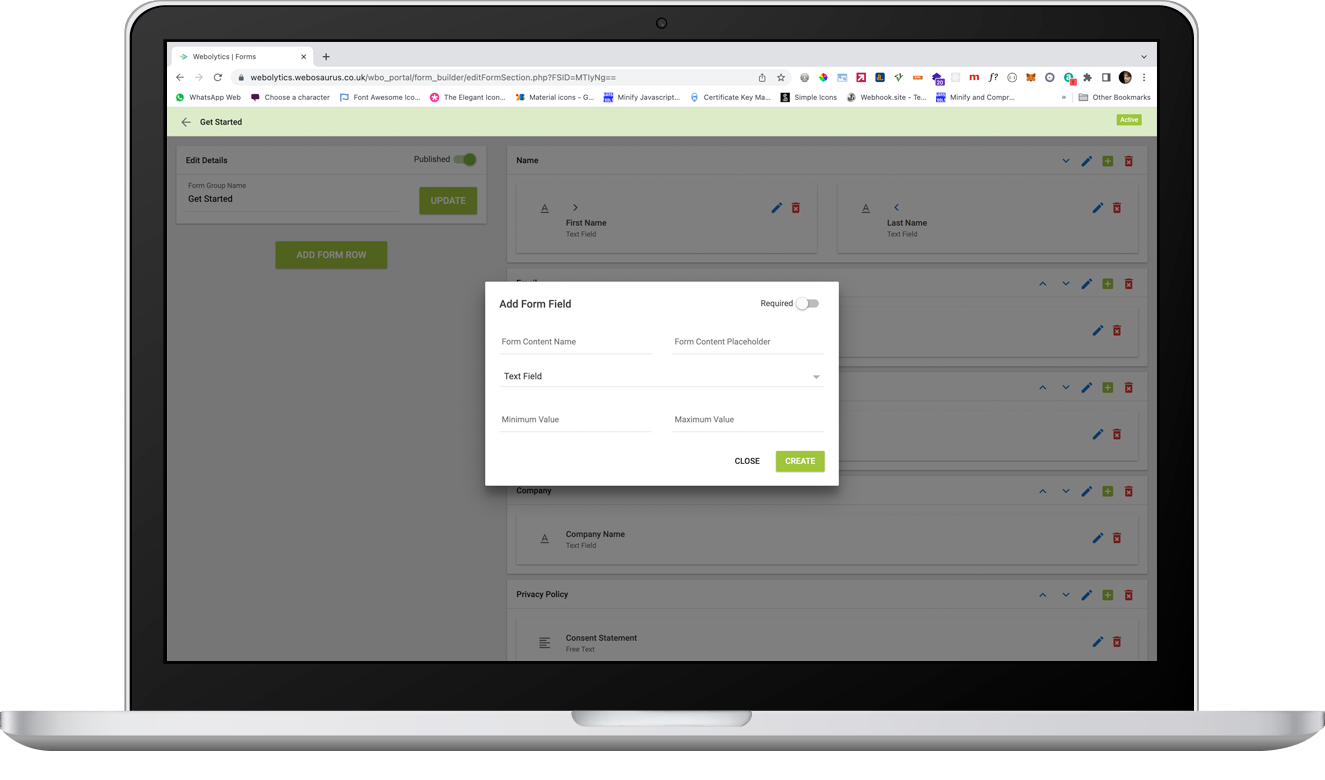
Here is an example of the fields that a form normally requires. also note that you can adapt the form to you own needs.
You can also add multiple stages to the form by adding more form groups by selecting the blue circle icon in the bottom right hand corner of the screen and clicking add form group or delete a selected form group, you can also add data map in this area.
You can also “Add Data Maps" for Acquisition. This section is where you will add Data for the fields.
Once finished simply click on the Form section and your new form will be ready to use.
If you have any questions adding forms please contact us by sending an email to support@webosaurus.co.uk or give us a call on 02075962843.