Form Reports
Webolytics Form Reports allow you to download form conversion data, for use out side of Webolytics. Reports are generated as a CSV file.
Creating the Report
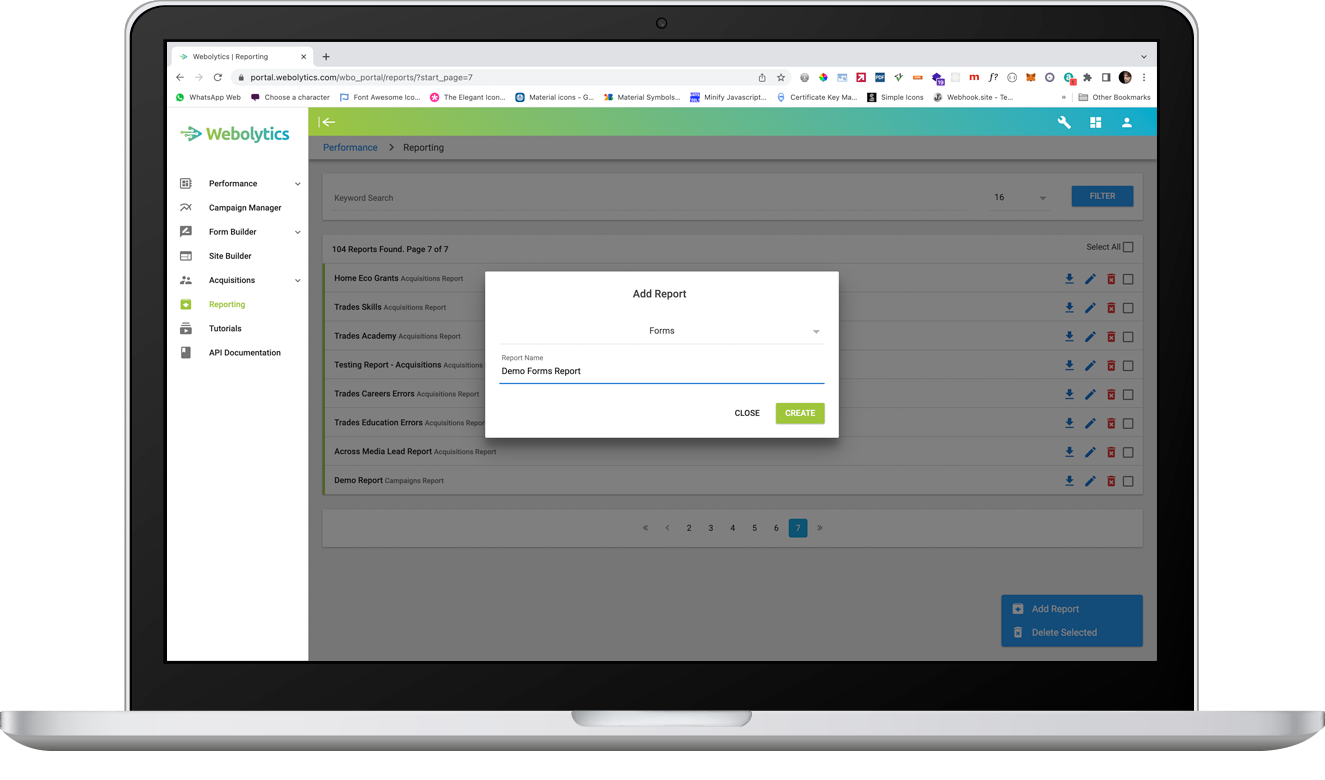
Go to the Reports, and click on the Blue Control Icon to the bottom right of the page, and then “Add Report”.
On the modal window that appears, select “Forms” as the report type, give your report a name and click “Create”.
Setting up the Report
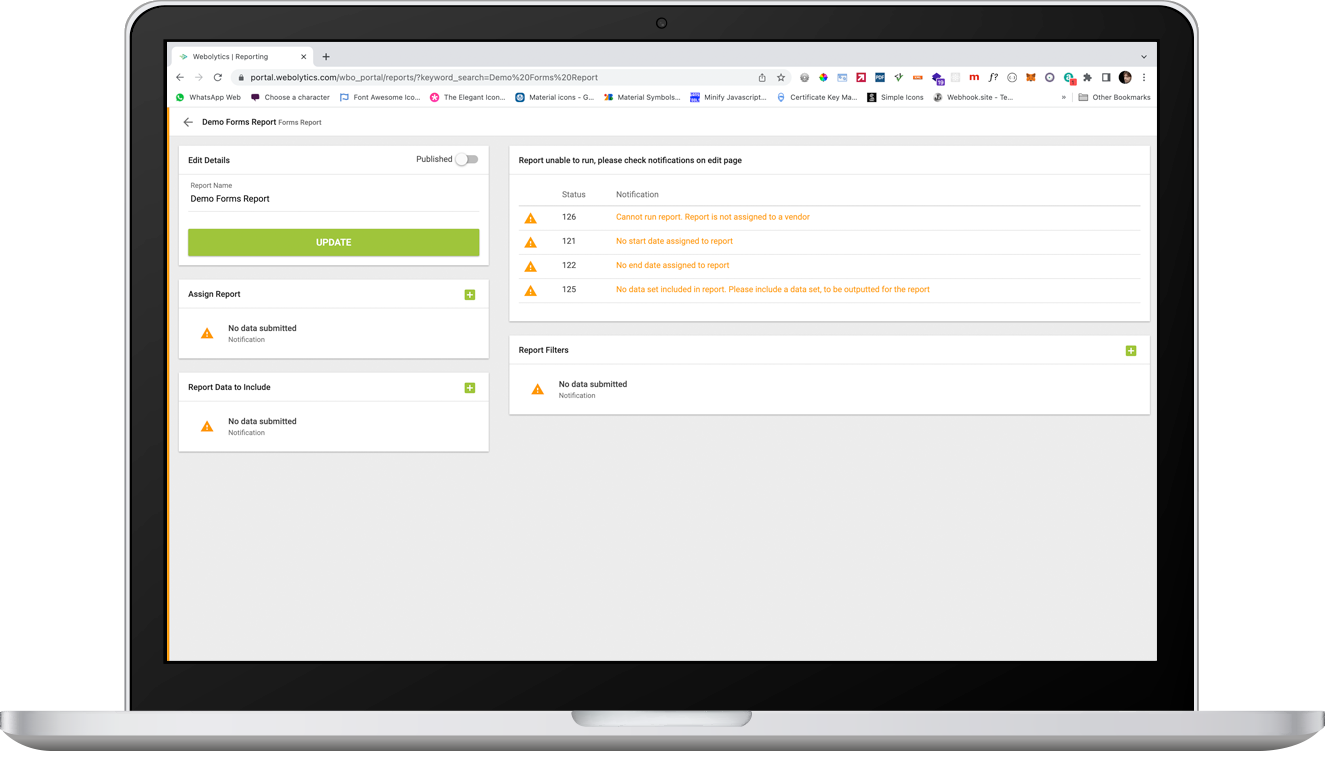
Once created, click the edit icon to the right of the Form Report. This will bring up an empty report. As a result, there will be 4 notifications which are stopping the report from running.
These errors are nothing to be concerned about and are only present because the report has just been generated.
These are:
- Cannot run report. Report is not assigned to a vendor (Status 126)
- No start date assigned to report (Status 121)
- No end date assigned to report (Status 122)
- No data set included in report. Please include a data set, to be outputted for the report (Status 125)
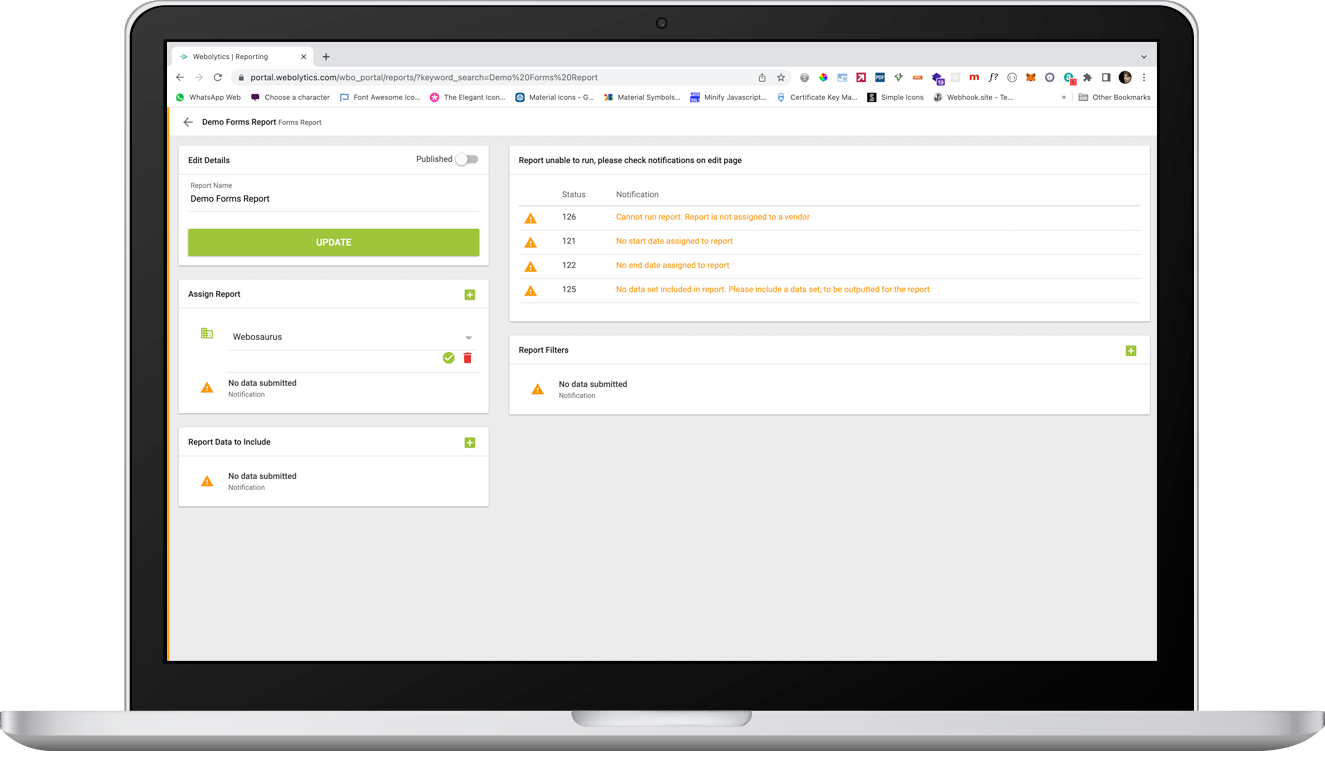
Assign your desired vendor to clear error Status 126.
To assign a vendor, click the green ‘+’ button to the top-right of the Assign Report block, and select your desired vendor. Once chosen, click the green tick to the right of the Assign Report block.
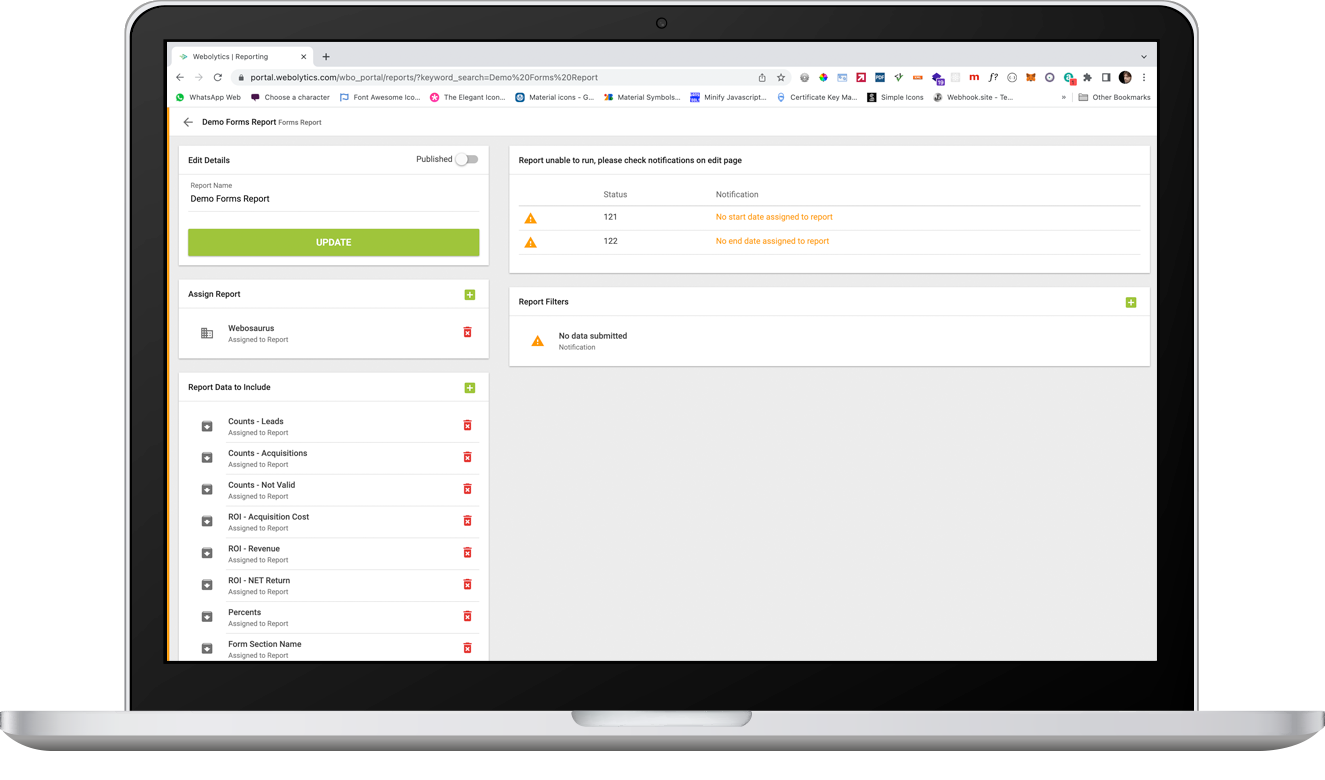
To clear error status 125, you will need to select which data to include in your report.
To do this click the green ‘+’ button to the top-right if the Report Data to include block.
The options available are:
- Counts - Leads: Show the amount of leads that the form has generated
- Counts - Acquisitions: Show the amount of acquisitions that the form has generated
- Counts - Not Valid: Show the amount of failures that has occurred on each form
- ROI - Acquisition Cost: Show the CPC/CPL/CPA/Rev Share total against the form
- ROI - Revenue (Not available for Affiliates/Advertisers): Shows the amount of ROI generated against each form
- ROI - NET Return (Not available for Affiliates/Advertisers): Shows the NET return (ROI - Cost) on each form
- Percents: Shows percent of each count selected for each form
- Form Section Name: Show the form name on the report.

Repeat the process above to select your desired data to include in the report.
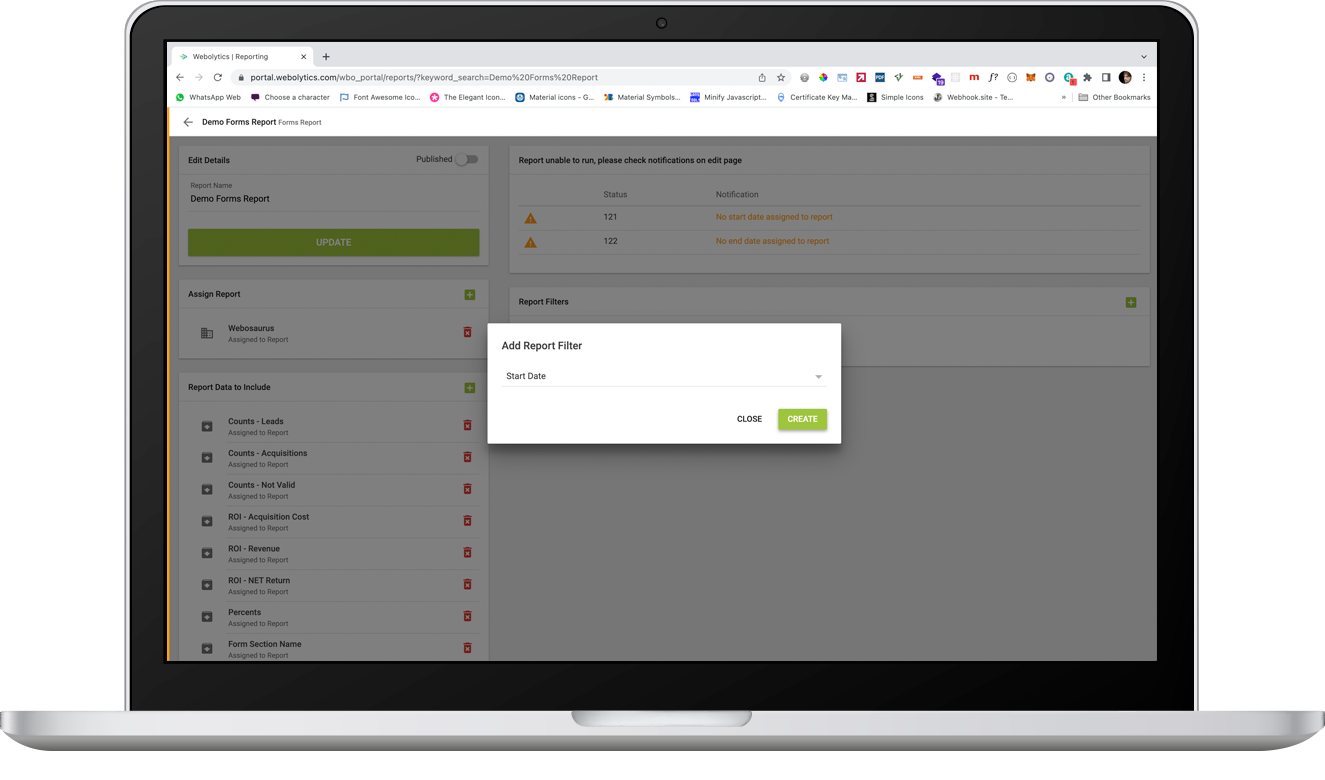
To clear Error Status 121, a starting date for the report needs to be included in the Report Filters. To do this click the green ‘+’ button to the top-right if the Report Filters to include block.
Select ‘Start Date’ and click ‘Create’
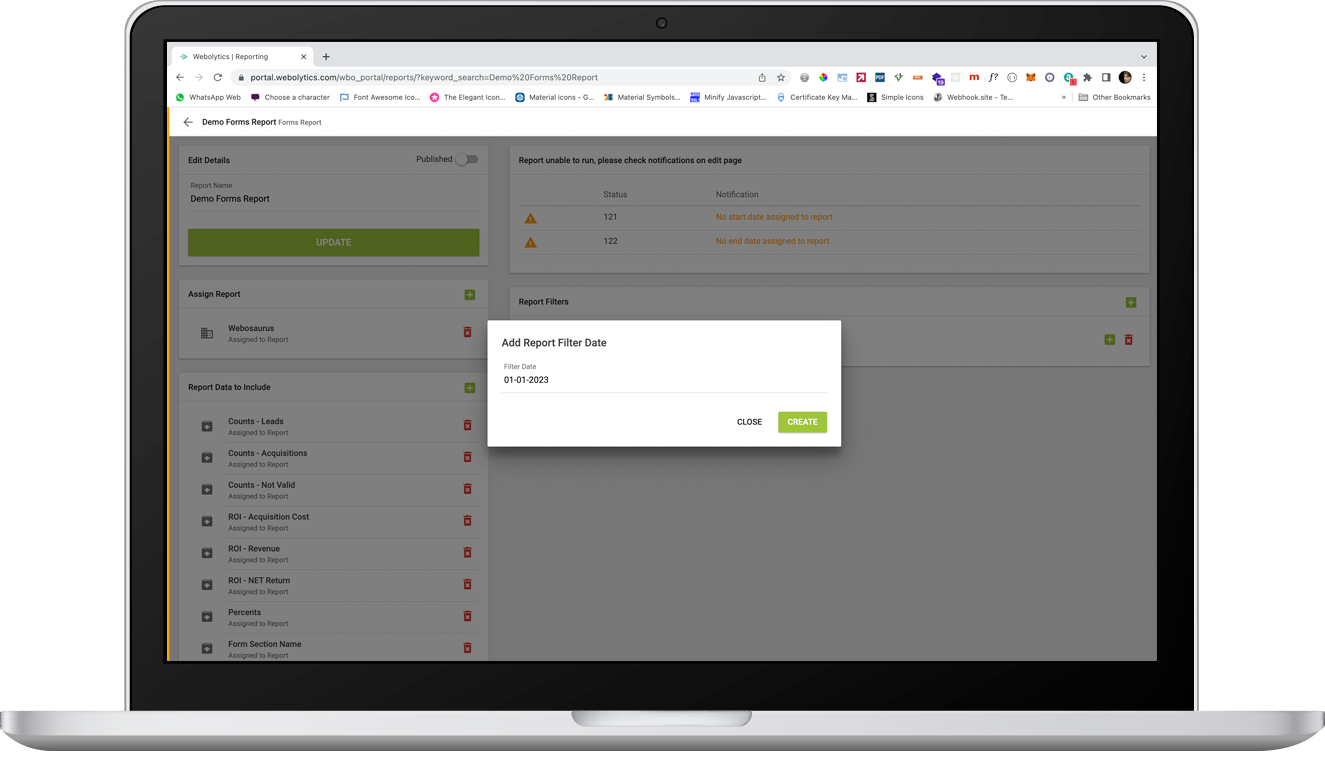
Once created, click the ‘+’ button to the right of the date filter to add a date value into the filter.
Select the desired starting date, and click ‘Create’
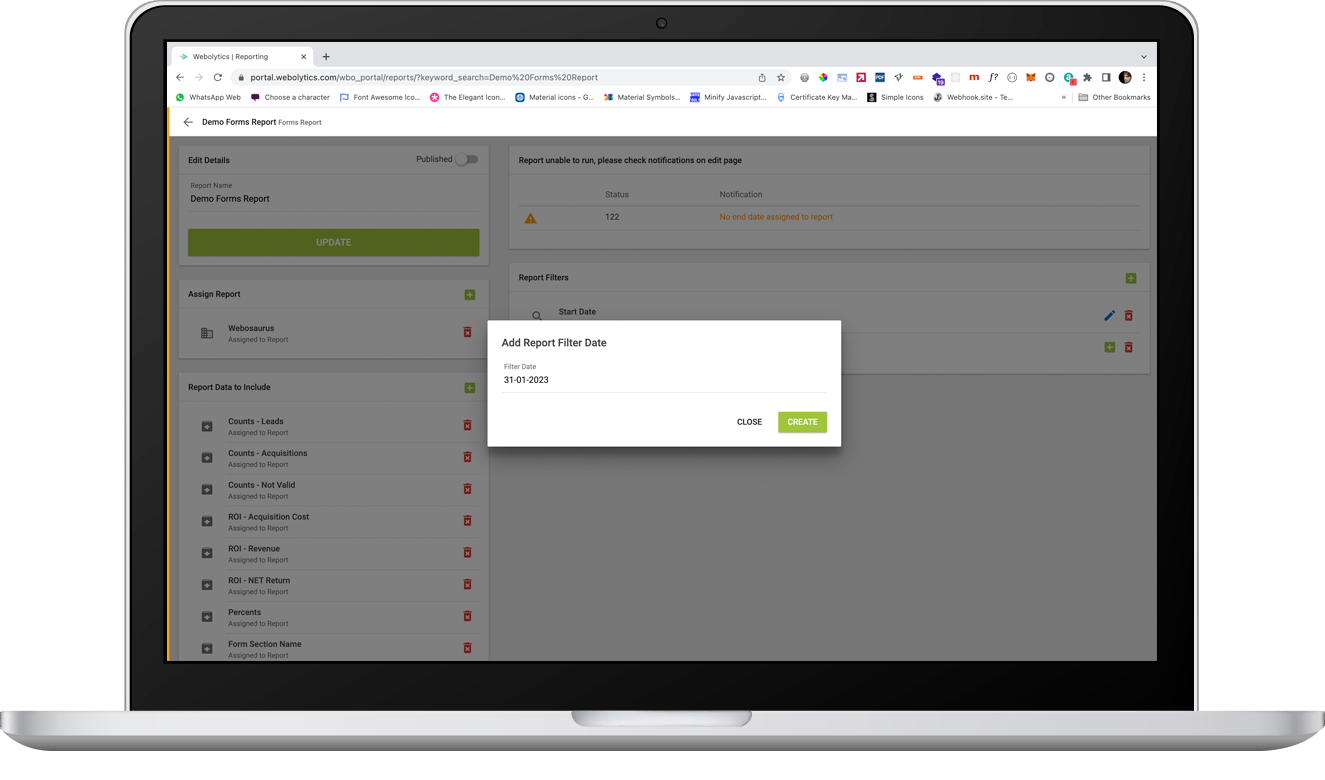
To clear Error Status 122, an ending date for the report needs to be included in the Report Filters. To do this click the green ‘+’ button to the top-right if the Report Filters to include block.
Select ‘End Date’ and click ‘Create’

Once created, click the ‘+’ button to the right of the date filter to add a date value into the filter.
Select the desired end date, and click ‘Create’.
Important: If the date range is larger than one month, then you will see an error stating this, and the report will not run.
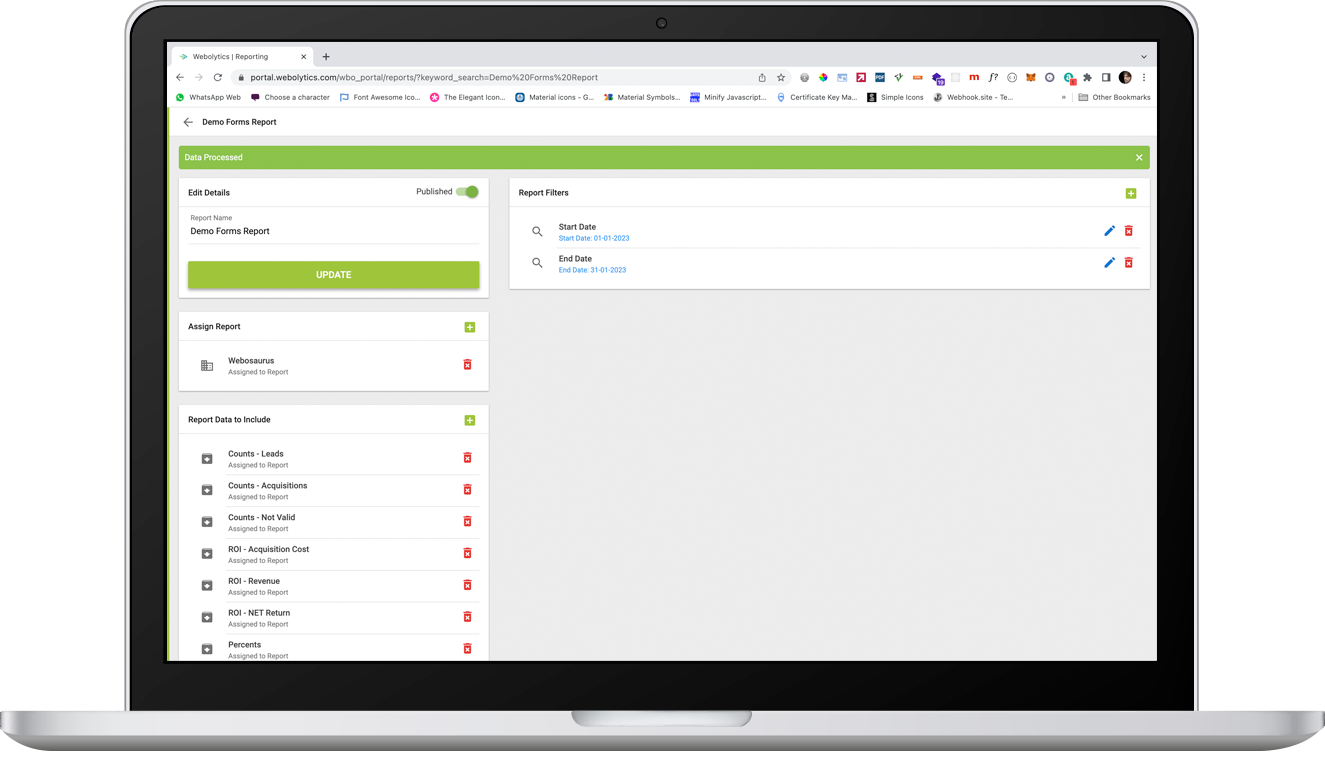
The report should now have no errors assigned against it. If you want to turn on your report, select the published switch in the Edit Details block to the top-left of the page and click ‘Update’.
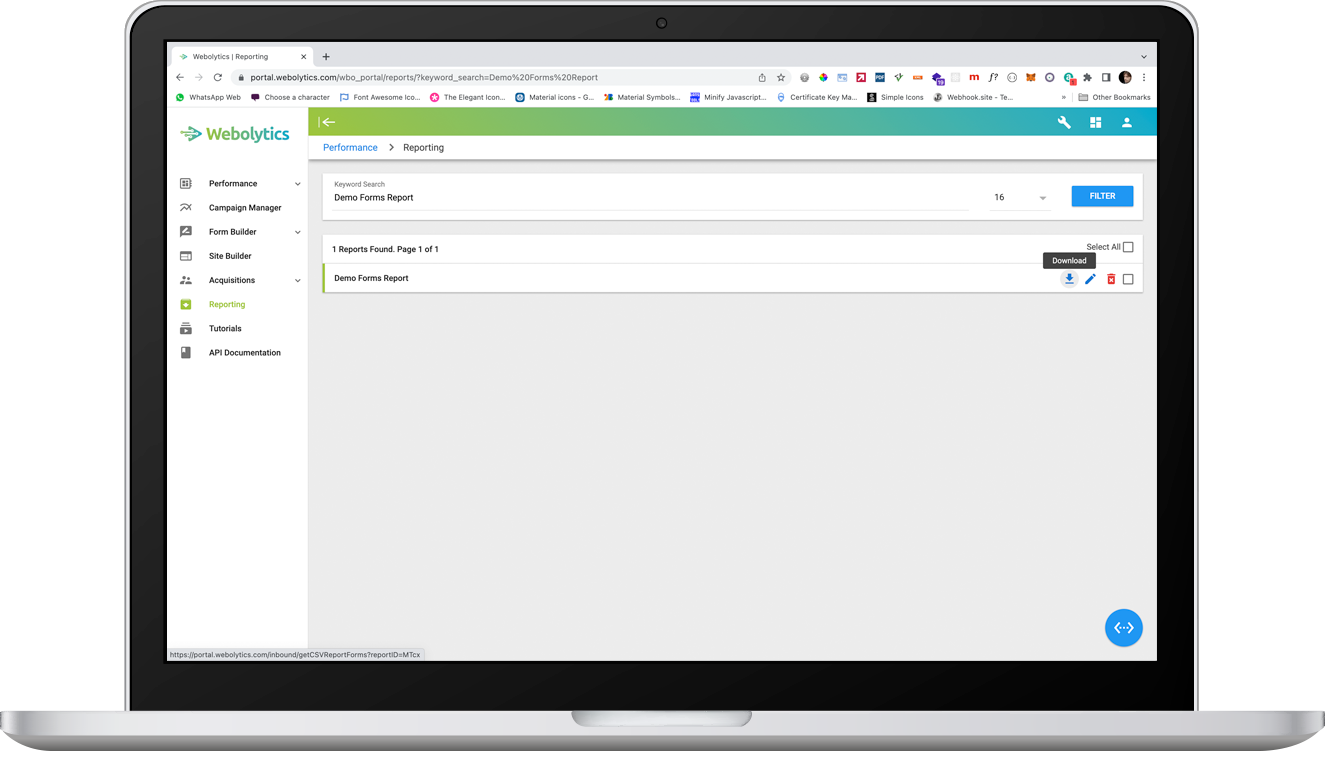
To run your report, click the ‘Download’ button next to the report in the report list.
Additional Filters
There are additional filters that can be used to refine you report if you desire. These are listed below:
- Campaign Section: Only include the selected Campaign Section in the report
- Campaign Groups: Only include selected Campaign Groups in the report
- Assigned Vendors: Only include information for specific vendors
- Forms: Only include certain forms for the report