Create a Vendor
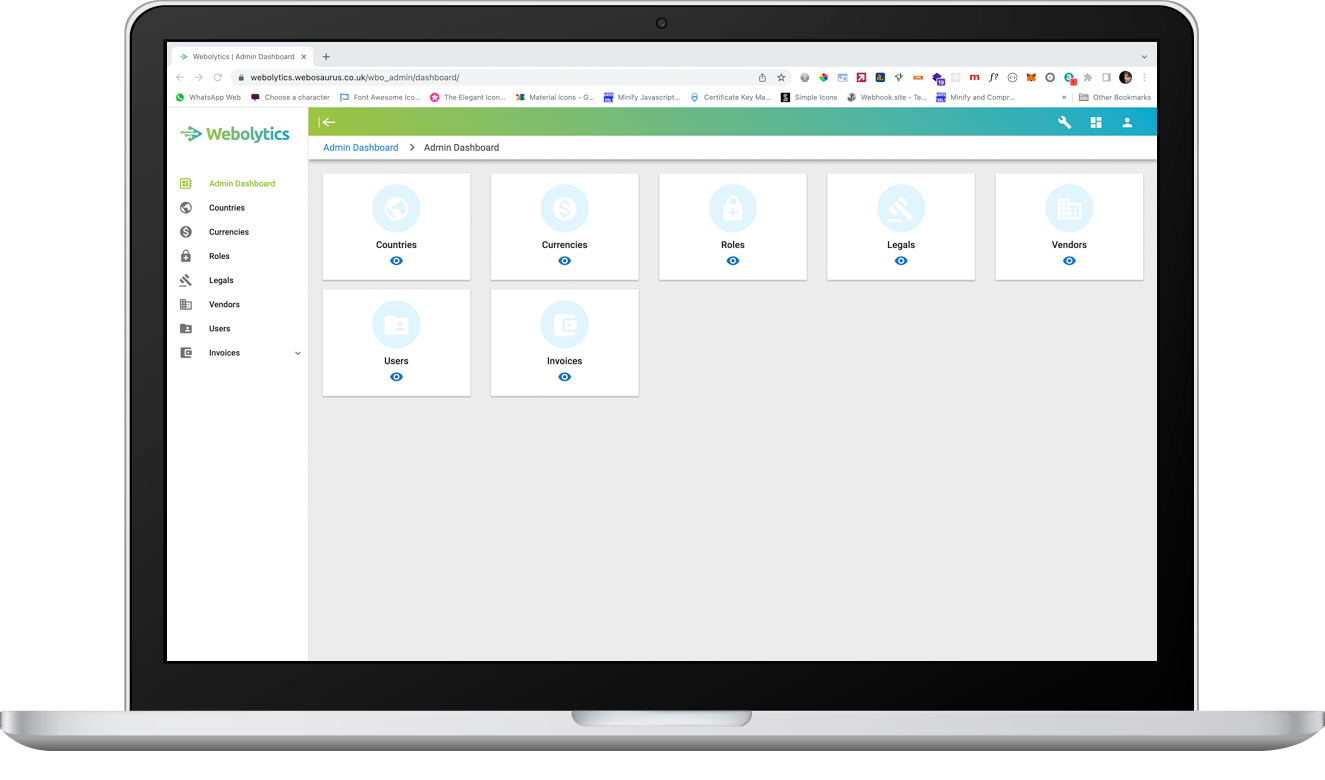
To add a vendor to Webolytics, select the spanner in the top right corner to access the admin console.
You then need to select Vendors. This can be done from the toolbar on the left or clicking the eye icon below the vendors section on the right.
Here you will see a list of all available vendors.
To add a new vendor, click the blue button in the bottom right corner and select “Add Vendor”.
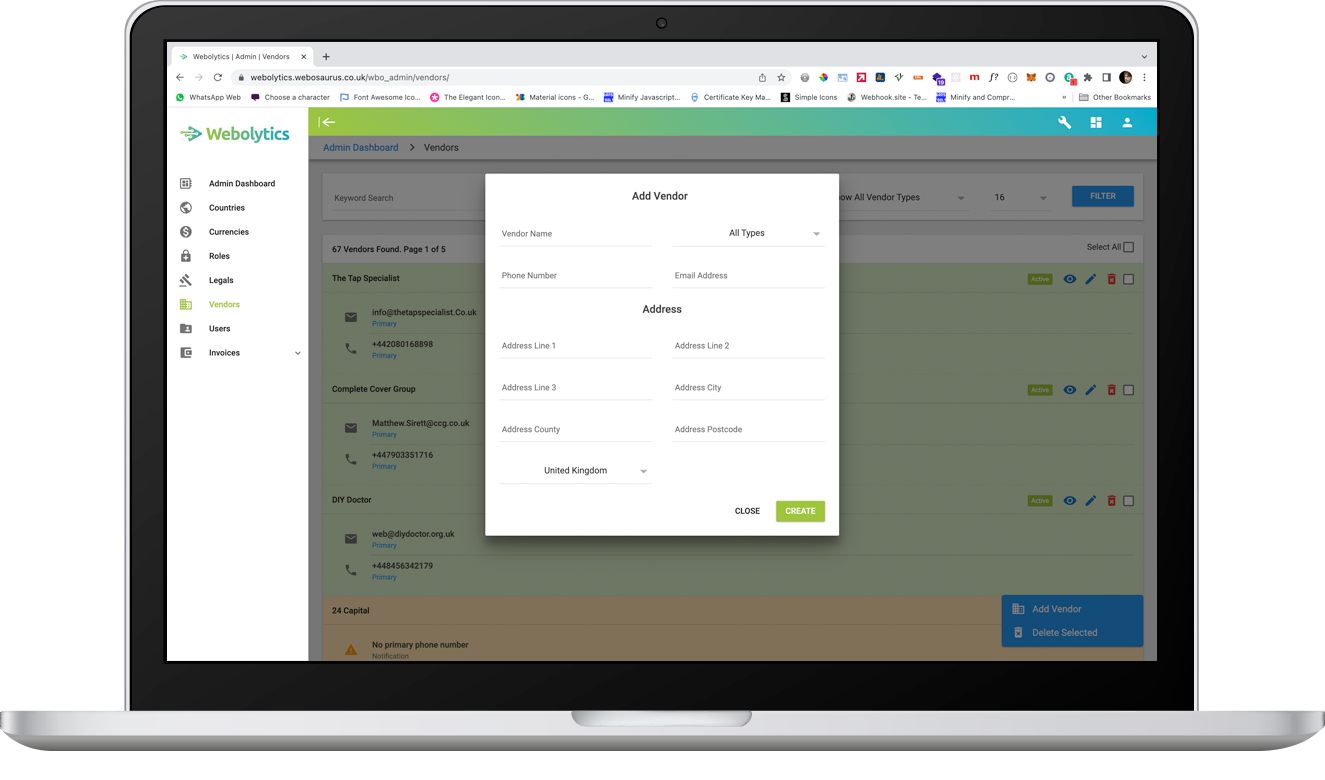
You will now be able to fill out the form containing the initial details of the vendor. Once this is complete, click “Create” to add the vendor.