Campaign Management
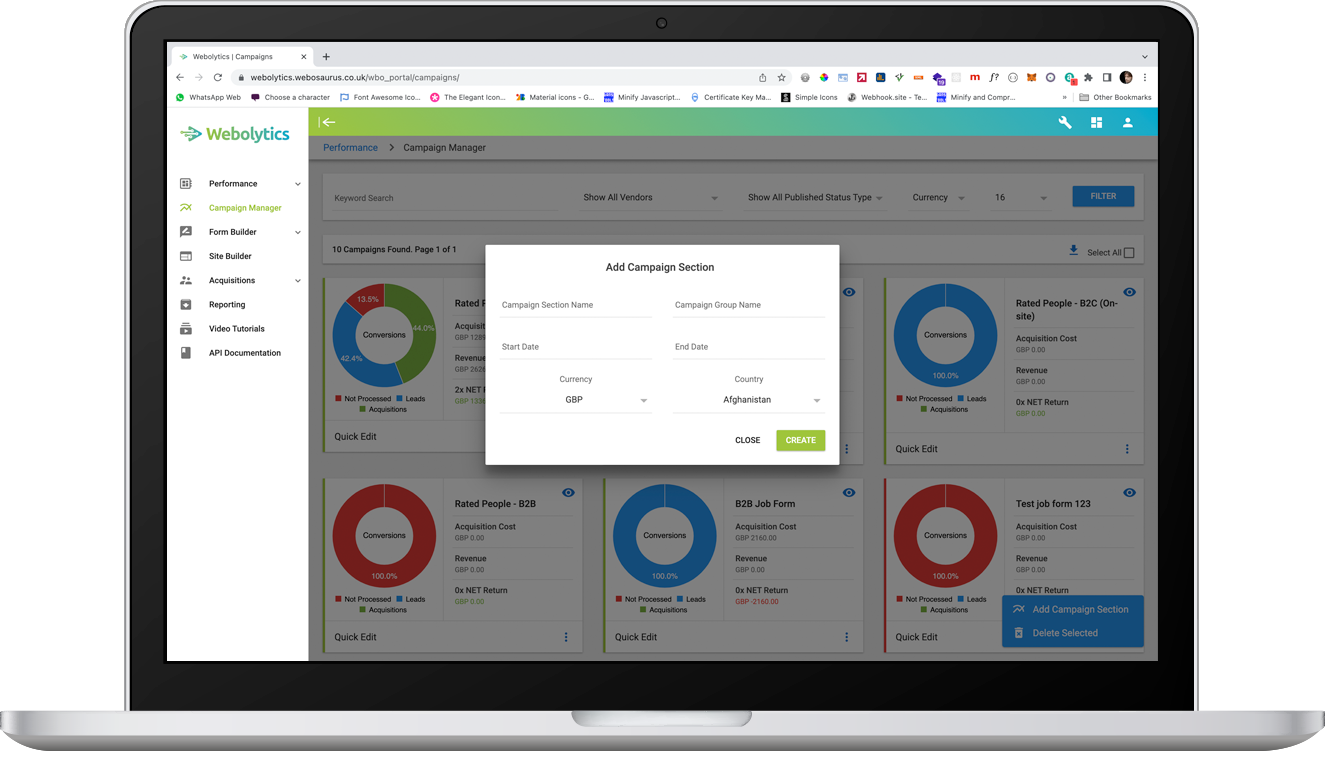
To create a new campaign, select “Campaign Manager” from the menu on the left. Click the blue button in the bottom right corner and select “Add Campaign Section”.

Enter your campaign name, as well as your first group name. You can choose to enter a start/end date however it is not compulsory at this stage. Then select the currency and country of trading.
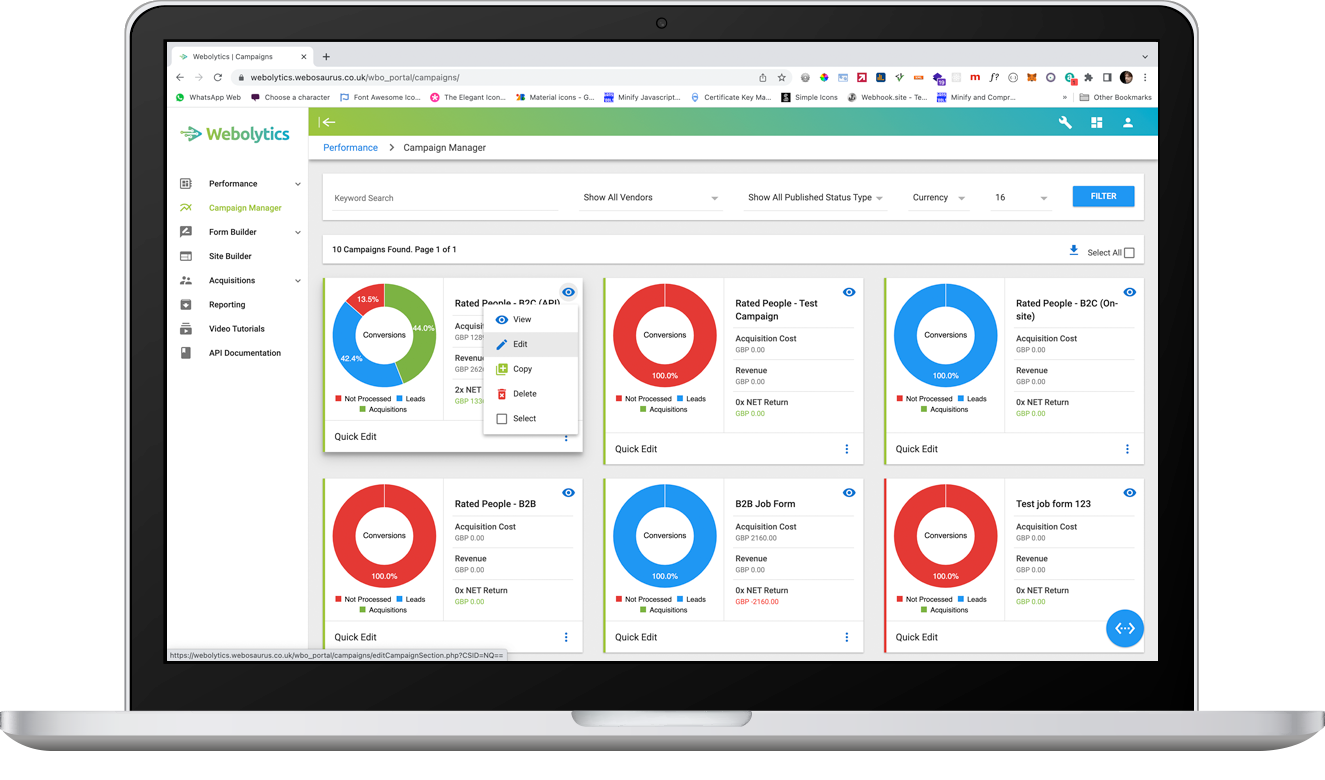
Hover over the blue eye icon and select “Edit”. Now we can start to fill out our campaign.
First select a start and end date for your campaign. Then update.
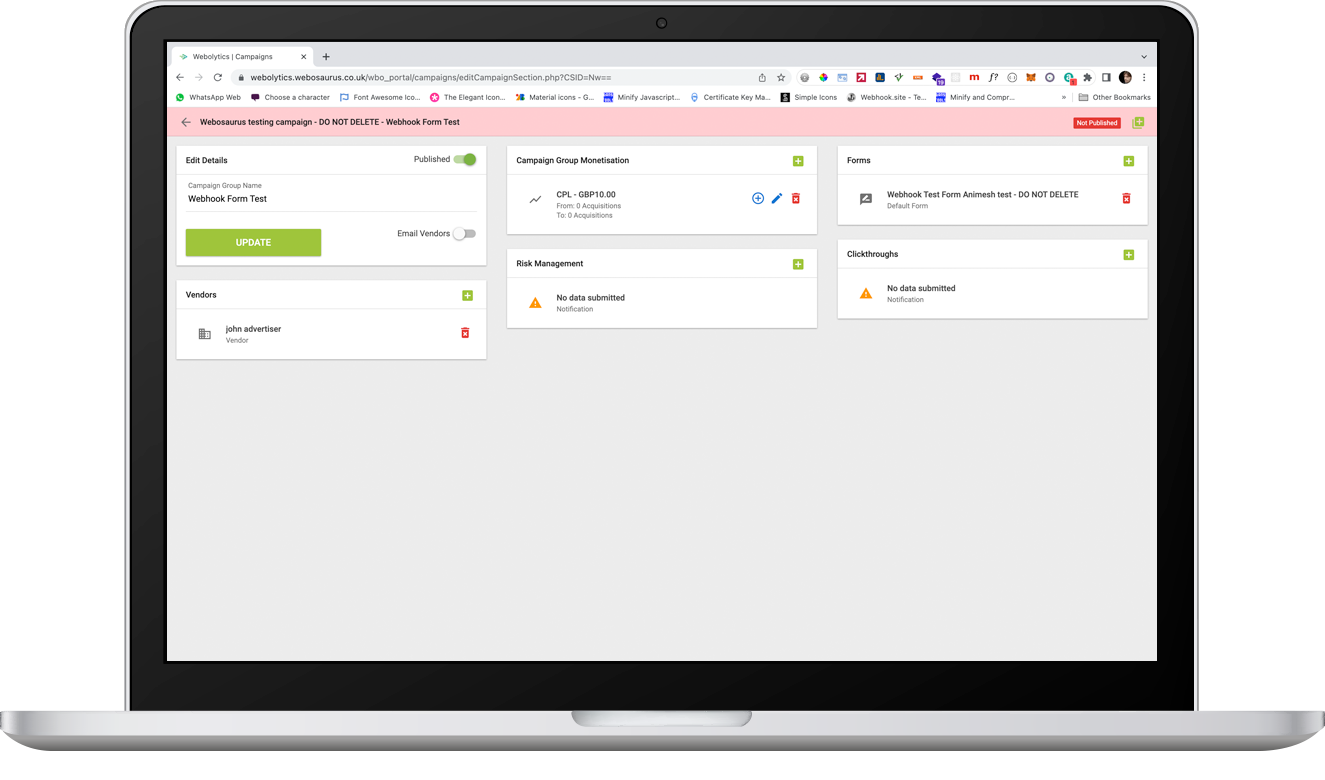
Assign every vendor that will use this campaign. If they are not listed, they cannot be assigned inside the campaign group.
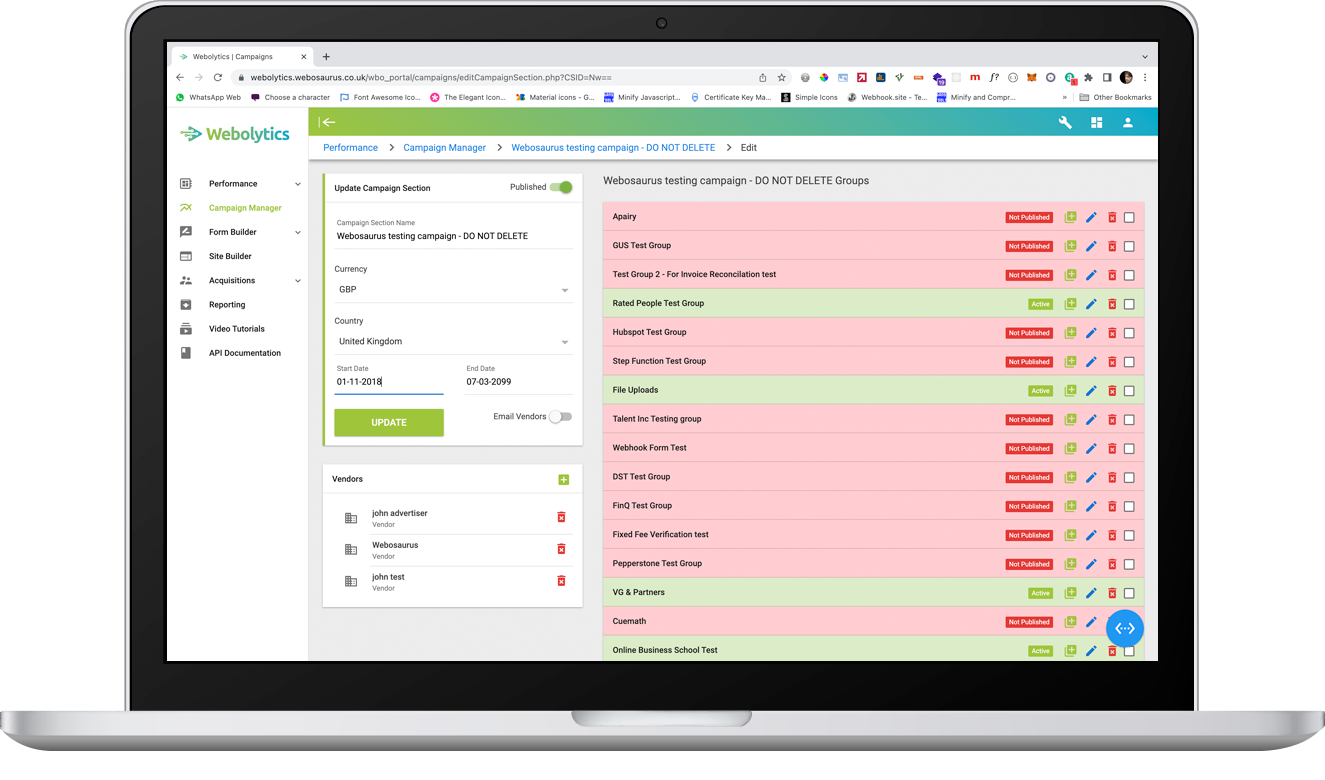
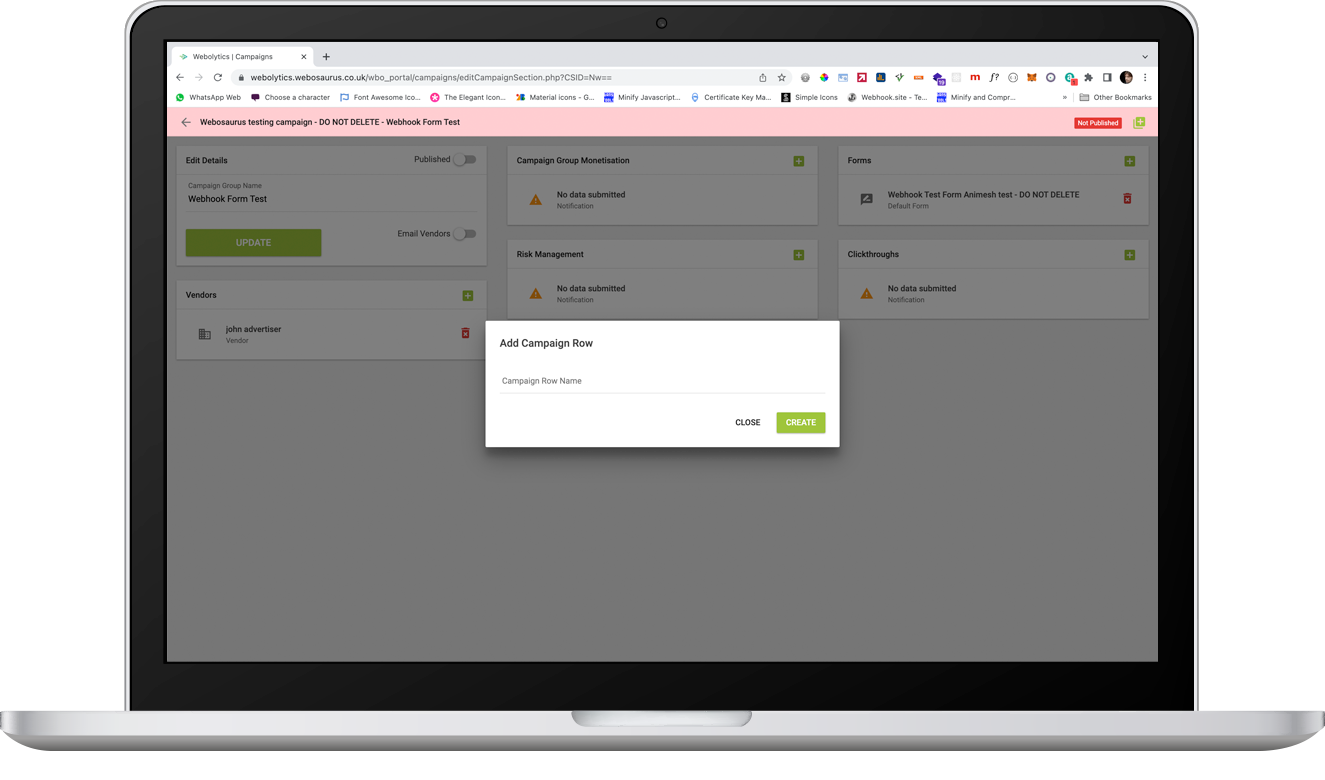
Edit your campaign group by clicking the blue pencil.
First, assign your vendors. As you can see, you can only assign vendors that have been added on the top level.
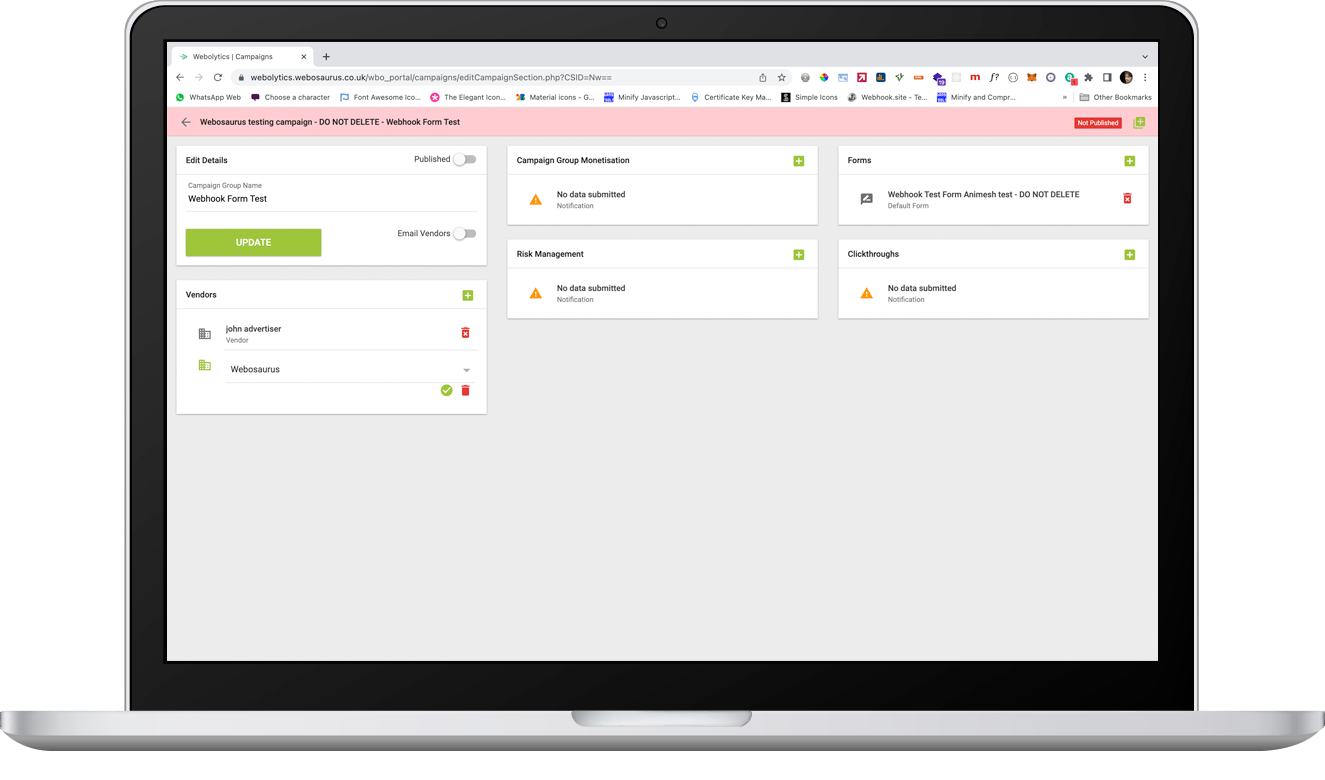
Now assign your campaign elements. This can either be forms, clickthrough’s or both.
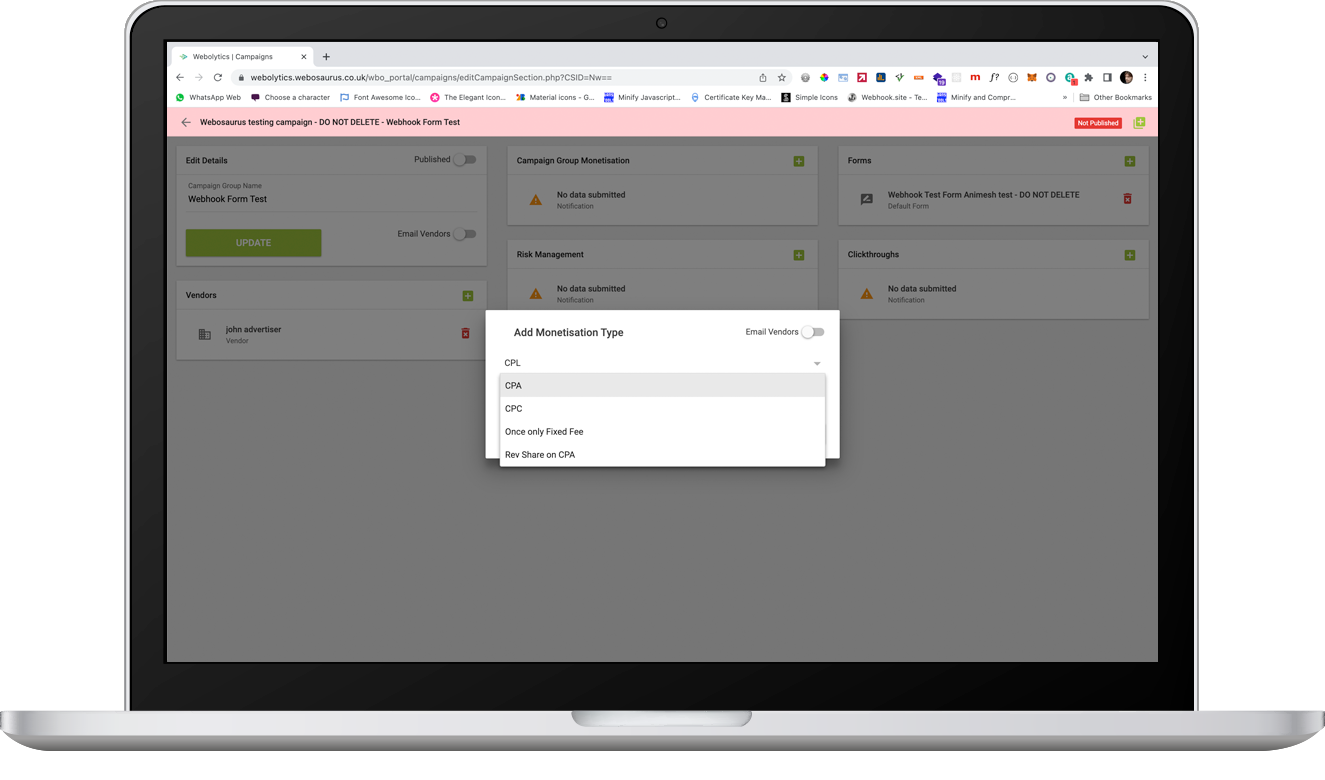
Add campaign monetisation rules by clicking the green addition button next to “Campaign Group Monetisation”. You can choose multiple different types of acquisition, select the value, as well as creating thresholds for value change. To add more thresholds, all you have to do is keep creating them.
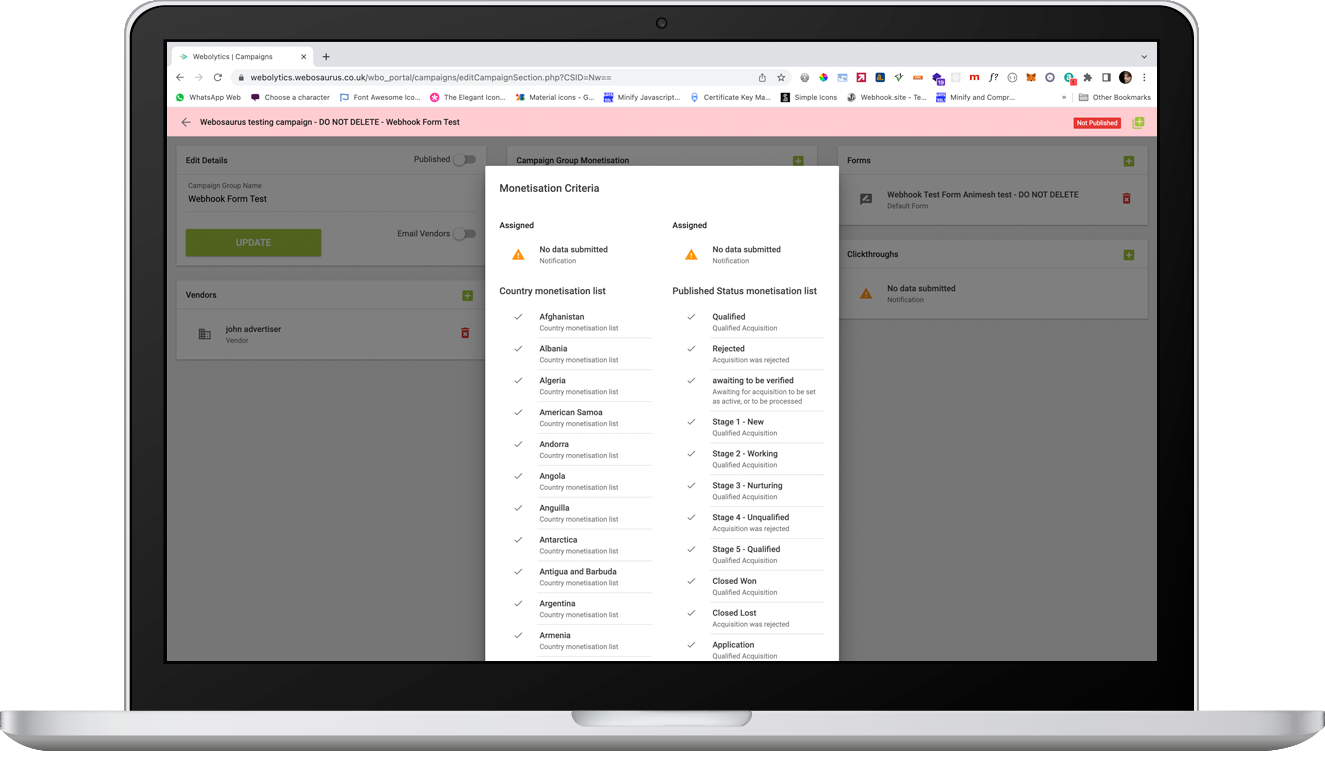
You can go even more granular by selection the addition button next to a monetisation rule. Here you can assign countries and specific publish statues for when you want to pay-out. In this example, it will only pay out to leads from Afghanistan, Albania and Algeria.
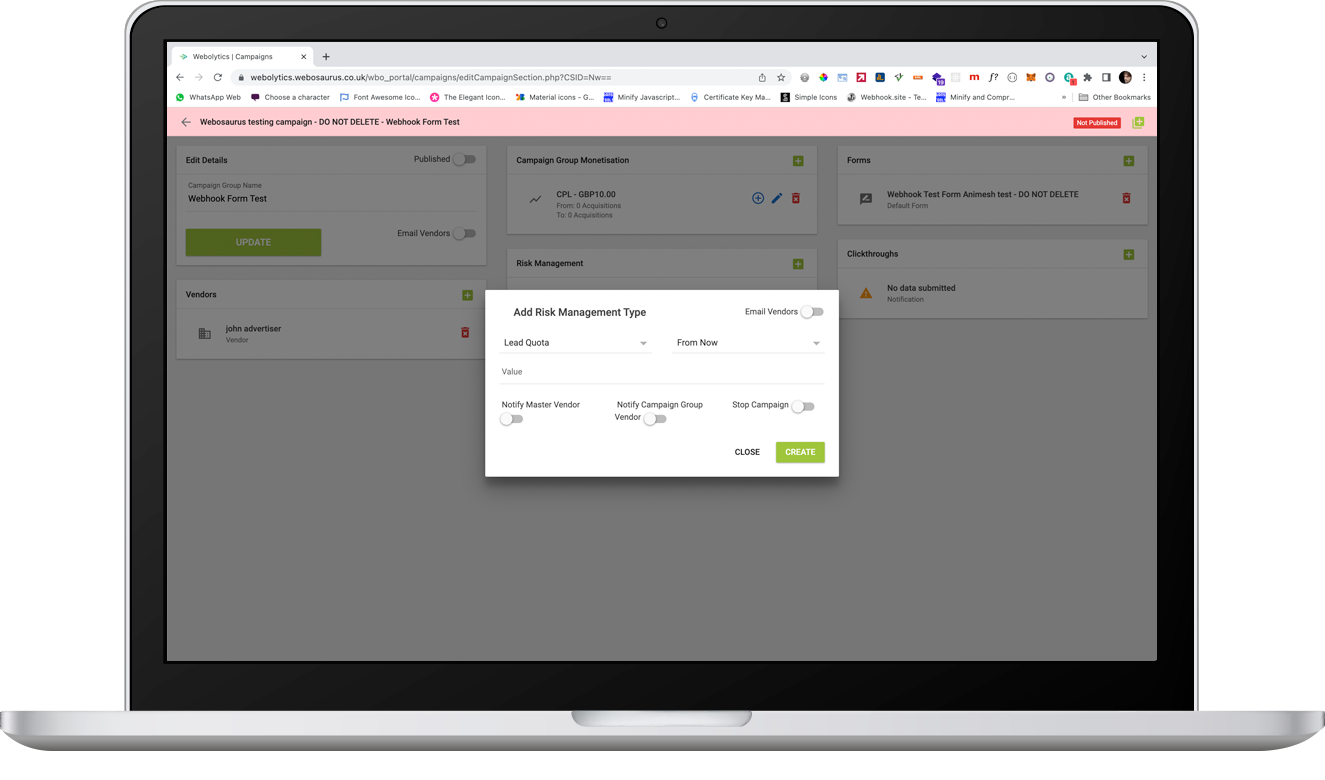
A unique Webolytics feature is risk management. This allows you to put procedures in place to create a risk-free campaign. In this example, if our campaign is making a loss of over £10,000, Webolytics will notify all vendors, campaign group vendors and stop the campaign.
Finally, if we select “Email Vendors” and update, it will notify all selected vendors as to the changes made.
You can also add multiple campaign groups to each campaign by just following the steps again.